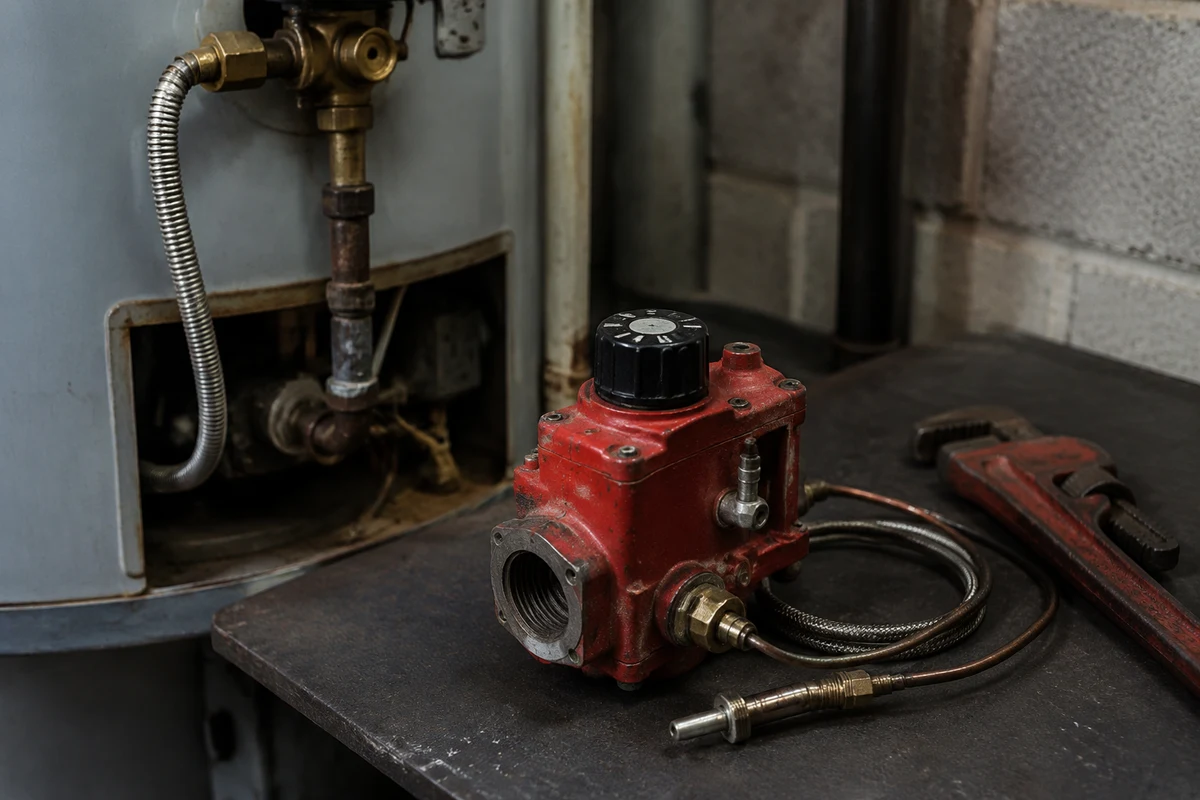
The gas control valve is the brain and the fuel gate of a gas water heater: it holds the temperature dial, senses the water temperature, powers off the pilot's thermopile, and decides when to open gas to the burner. When it fails — a stuck thermostat, an internal fault throwing a blink code, a valve that will not open the burner even with a good pilot — replacing it is a real repair. It is doable for a careful DIYer, but it involves draining the tank, disconnecting the gas line, and getting every joint leak-tight, so honesty about your comfort with gas work matters here.
First, make sure the valve is actually the problem
Gas control valves are among the more expensive parts on a water heater, so do not replace one on a hunch. The most common no-heat and pilot faults are cheaper parts. A pilot that will not stay lit is usually a bad thermocouple or thermopile, not the valve. A burner that will not fire could be a tripped thermal switch or a dirty burner. Rule those out first. The valve is the culprit when: the temperature dial no longer controls the water and it overheats or underheats regardless of setting; the unit throws a control or gas-valve blink code (like the five- or seven-flash codes on many A.O. Smith units) that returns after a proper reset; or the pilot and thermopile test good but the valve still will not open gas to the main burner. When those point at the valve, replacement is the fix.
Get the right replacement valve
Gas control valves are not universal. They differ by brand, by gas type (natural gas versus propane — never interchange these), by whether the unit uses a standing pilot with a thermopile or a piezo igniter, and by the tank's threaded fitting. Read the model and serial number off the rating label and match the valve exactly, ideally the manufacturer's specified part. If the heater is still under warranty — many carry six to twelve years — the valve may be free from the maker; you call with the serial number and pay only for labor or shipping. Fitting the wrong valve, or a natural-gas valve on a propane supply, is dangerous, so this is not a place to improvise with a close-enough part.
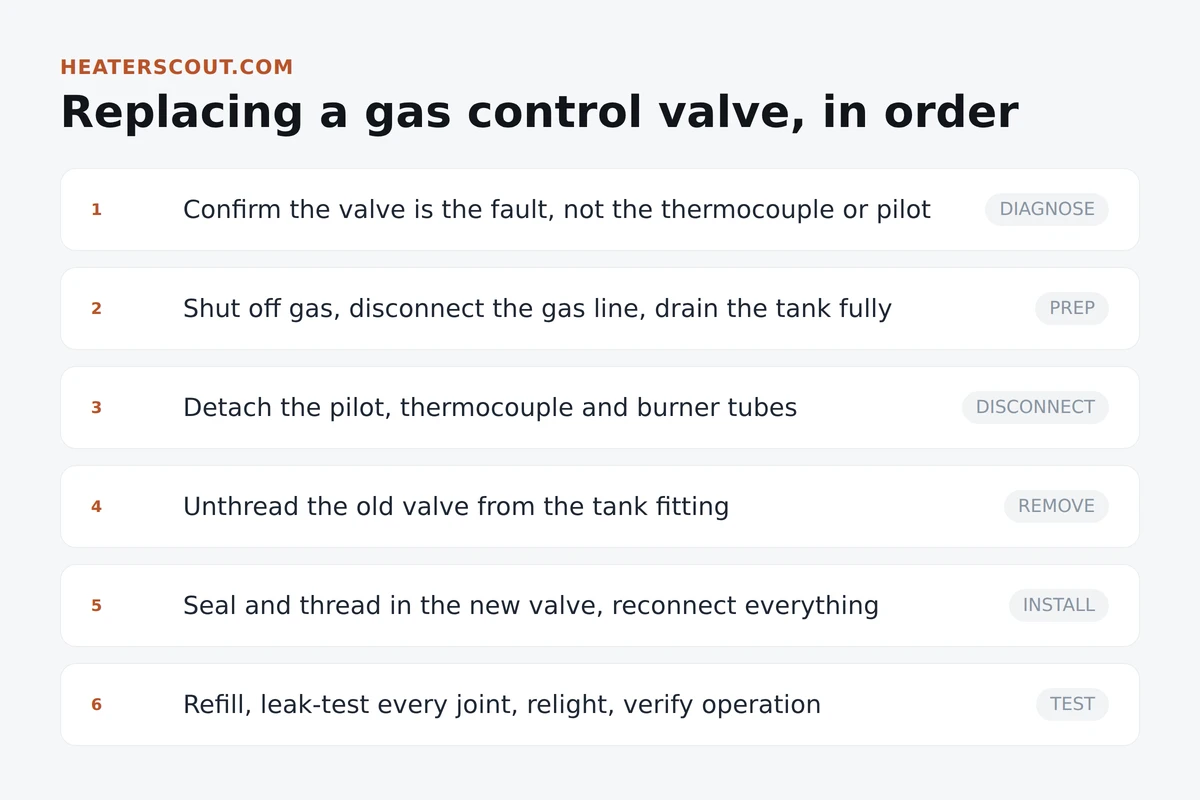
The replacement, step by step
Refilling before you fire it — the step people botch
A gas water heater must be completely full of water before the burner ever lights. Firing a dry or partially filled tank can damage the tank and is dangerous. After installing the valve and closing the drain, open the cold supply and a hot tap somewhere in the house. Let it run until water flows out in a steady stream with no sputtering air — that means the tank is full and the lines are purged. Only then restore the gas and relight. Rushing this to "just see if it works" is how people crack a new install.
When to hand it to a pro
This job sits at the edge of DIY. Disconnecting and reconnecting a gas line, sealing threaded gas joints, and leak-testing them are tasks that must be done right, because the failure mode is a gas leak. If you are not fully confident doing gas connections, or if local code requires a licensed technician and a permit for gas work — which many jurisdictions do — hire it out. There is also a simple economic check: on an older heater near the end of its life, the cost of a valve plus labor may approach the cost of a new heater, in which case replacing the whole unit makes more sense than the valve. Weigh the valve repair against the heater's age before committing.
Frequently asked
How do I know if my water heater gas control valve is bad?
Rule out cheaper parts first. A pilot that won't stay lit is usually the thermocouple, not the valve. The valve is likely the problem when the temperature dial no longer controls the water and it over- or underheats regardless of setting, when a gas-valve blink code returns after a proper reset, or when the pilot and thermopile test good but the valve still won't open gas to the burner.
Can I replace a gas control valve myself?
A careful DIYer can, but it involves draining the tank, disconnecting and resealing the gas line, and leak-testing every joint, because the failure mode is a gas leak. If you are not fully confident with gas connections, or if your local code requires a licensed technician and permit for gas work, hire it out. Always leak-test with soapy water, never a flame.
How much does it cost to replace a gas control valve?
The valve itself is one of the more expensive water-heater parts, and with professional labor the total can approach the cost of a new heater on an older unit. Check the warranty first, since many heaters carry six to twelve years and the valve may be free from the manufacturer. On a heater near the end of its life, replacing the whole unit often makes more sense than the valve.
Do I need to drain the tank to replace the gas valve?
Yes, completely. The valve threads into the tank below the water line, so if the tank is not empty, water pours out when you remove it. Shut off the cold supply, connect a hose to the drain valve, open a hot tap to break the vacuum, and drain the tank fully before removing the old valve.
How do I make sure there's no gas leak after replacing the valve?
Before relighting, turn the gas on and brush soapy water over every joint you touched: the supply union, the valve body, and the pilot and burner tubes. Growing bubbles mean gas is escaping and the joint must be redone. Never test with a flame, and if you smell gas you cannot locate, shut off the supply and call the gas utility.
Why does the tank need to be full before lighting the burner?
Firing a dry or partially filled gas water heater can damage the tank and is dangerous. After installing the valve, refill the tank and open a hot tap until water flows out in a steady stream with no sputtering air, which confirms the tank is full and the lines are purged. Only then restore the gas and relight the pilot and burner.
Are gas control valves interchangeable between water heaters?
No. They differ by brand, by gas type (natural gas versus propane, which must never be interchanged), by ignition style, and by the tank's threaded fitting. Read the model and serial number off the rating label and match the valve exactly, ideally the manufacturer's specified part. Fitting the wrong valve or the wrong gas type is dangerous.