Quick answer
A leak from the top of a water heater is almost always a fitting, not the tank — which is good news, because fittings are cheap and fixable. The location tells you which one: the cold inlet, the hot outlet, the T&P valve, or the anode port. A leak from the bottom is the opposite — usually the tank itself corroding through, which means replacement. So the first job is to find exactly where the water is coming from.
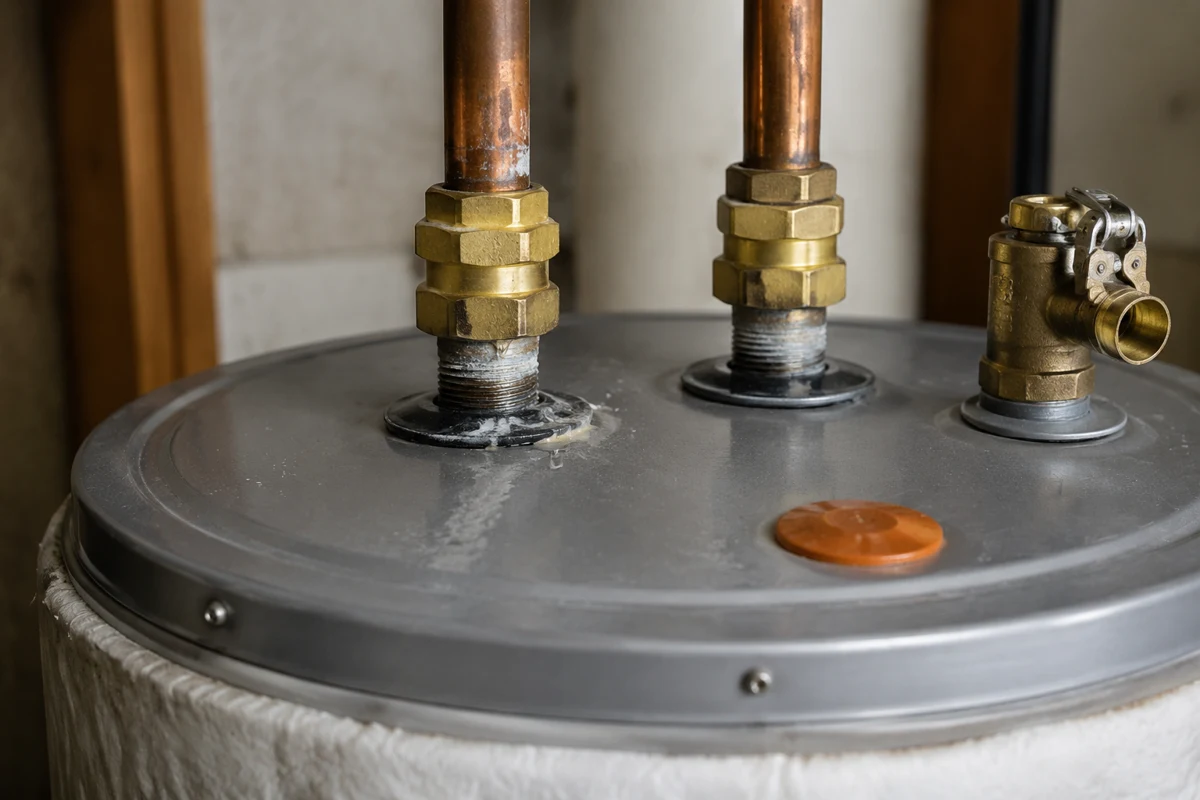
Top-of-tank anatomy — where the water shows up
- Cold-water inlet nipple & shutoffA loose joint or corroded dielectric union seeps here.Easy: tighten or swap the union
- Hot-water outlet nippleUsually a loose fitting or weeping flex connector, not the tank.Easy: tighten or swap the union
- T&P relief valveWeeping from the discharge tube means the system is over-pressure — the valve is venting, not failing.Trouble: pressure problem
- Inlet & outlet dielectric unionsThe two usual suspects. Aged unions crust with mineral and drip.Easy: replace the union
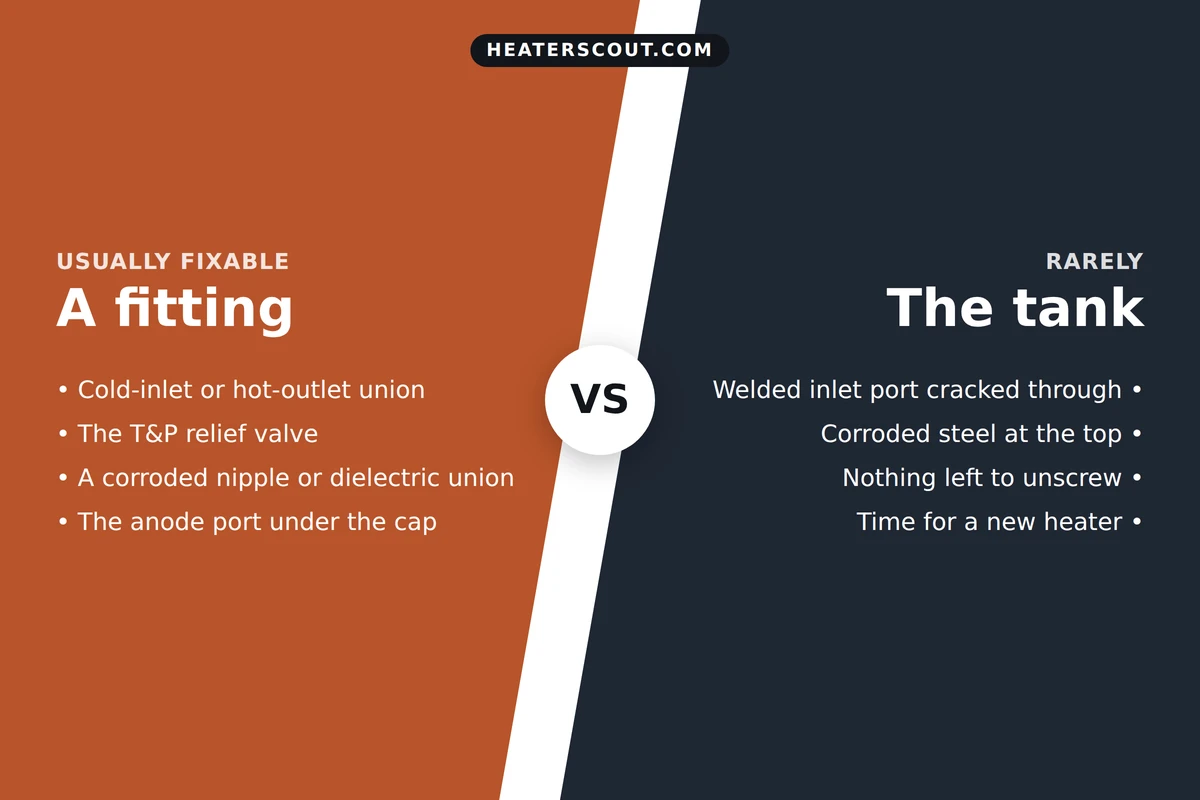
The relief here is real: a top leak rarely means a dead heater. It means a connection is loose, a seal is worn, or you’re looking at condensation. Find the exact fitting and the fix usually costs a few dollars and an afternoon.
First, kill the power and dry it off
Before anything, shut off the electricity or gas and close the cold-water inlet. A top leak dripping onto electrical connections is a genuine shock and fire hazard, so this isn’t optional. Then dry the whole top of the tank with a towel — you can’t trace a leak through standing water. With it dry, restore water and heat and watch closely for a few minutes to see where the first bead appears and which way it runs.
Point to where it’s wet
On a top leak, the location is the diagnosis. Tap the spot that’s wet and you’ll get the likely cause and the fix.
Where is the water coming from?
Dry the top first, then find the wettest fitting.
Tap a location
Choose the spot where you see or feel water to get the likely cause.
Reading the corrosion for a clue
If you can’t catch the drip in the act, the mineral trail gives it away. Rust buildup or a whitish, chalky powder crusted at a joint marks where water has been evaporating — that’s your leaking fitting even when it’s momentarily dry. Inlet and outlet connections are often joined with dielectric nipples, inexpensive parts that keep dissimilar metals from corroding each other; when they age, they seep, and swapping them is a hardware-store job.
The T&P valve: two very different leaks
The temperature-pressure relief valve is a safety device set to open at 150 psi or 210°F, whichever comes first, to keep the tank from becoming a pressure vessel. When it leaks, figure out where:
- From the threaded base where it screws into the tank — the valve’s seal has failed. Replace it. A correct valve is under $15; just match the 150 psi rating, because a wrong low-pressure valve will weep immediately.
- From the discharge tube pointing at the floor — the valve is doing its job, dumping water because the system hit its pressure or temperature limit. The valve isn’t the problem; the pressure is.
When the discharge means thermal expansion
If a good valve keeps releasing from its discharge tube, your plumbing is probably a closed system — a check valve or pressure-reducing valve at the meter stops water from expanding back into the main as it heats. With nowhere to go, pressure climbs until the T&P valve vents. Normal house pressure is 40–80 psi static; anything over 80 needs correcting. The proper fix is a thermal expansion tank, which gives the heated water a cushion to expand into. If you already have one and the valve still drips, that tank is likely waterlogged or has lost its air charge and needs recharging or replacing.
Condensation that only looks like a leak
Not every wet tank is leaking. On a brand-new heater, or when a tank refills with very cold inlet water, moisture beads on the cold steel and drips — classic condensation. The tell is timing: a real leak reappears quickly and regardless of use, while condensation shows up when the heater is working hard and dries up once the water inside is hot. Dry everything, run a normal hot-water cycle, and watch. If it stays dry once things heat up, you were chasing sweat, not a leak.
Loose fittings and tired flex connectors
The most common top leak is also the most boring: a connection that simply worked loose. Years of the tank heating and cooling expand and contract the metal, and a fitting that was snug on install develops a slow weep. The fix is a careful quarter-turn with a wrench — careful, because over-tightening cracks fittings and strips threads, trading a drip for a bigger leak. If the threads are already corroded, don’t try to reseal them; replace the nipple with a new one and fresh PTFE tape.
Braided flex connectors are another quiet culprit. The corrugated stainless line that links your rigid plumbing to the tank can weep at its crimped ends or through a pinhole as it ages. You won’t always fix a flex line — if the connector itself is leaking rather than its fittings, swap the whole connector. They’re a few dollars and take minutes, and it’s worth replacing both the hot and cold sides at once so you’re not back under the tank a month later chasing the other one.
What these fixes cost
The reassuring part of a top leak is the price tag. A replacement T&P valve runs under $15. A dielectric nipple or a braided connector is a few dollars each. An anode rod is inexpensive and doubles as maintenance. Even a thermal expansion tank, the priciest item on this list, is modest next to a new water heater. Compare that to a bottom leak, where the only real answer is a full replacement running many hundreds of dollars installed — which is exactly why pinning down the location before you spend is worth the ten minutes it takes.
Why top beats bottom, and when to stop fixing
Top leaks live in the fittings, and fittings tighten or swap out. A bottom leak is water weeping from the tank body itself, which means the inner steel has corroded through — and there’s no safe patch for that. Welding or sealing a rusted tank isn’t viable; a corroded tank only gets worse and can eventually fail outright. So if you trace the water to the base rather than a top fitting, stop spending on parts and budget for a replacement. That single distinction — fitting on top versus tank at the bottom — is the whole decision.
Refill the tank completely before restoring power to an electric heater. Firing an element in a partly empty tank burns it out in seconds. And never cap or plug a leaking T&P valve to stop the drip — that defeats the one device standing between your tank and a dangerous overpressure.
Frequently asked
Is a water heater leaking from the top an emergency?
Usually not, but treat it seriously. A top leak is almost always a fitting, which is fixable, yet water dripping onto electrical connections is a shock and fire hazard. Shut off the power or gas and the cold-water inlet, dry the area, and find the source. If instead the water is pooling at the base, that’s a failing tank and a bigger problem.
How do I find exactly where the top leak is coming from?
Turn off power and water, dry the entire top with a towel, then restore water and heat and watch where the first drip forms. Look for rust or whitish mineral crust at a joint, which marks a chronic leak point. The usual suspects are the cold inlet fitting, the hot outlet fitting, the T&P valve, and the anode port.
My relief valve is dripping — do I replace it?
Depends where it drips. If water comes from the valve’s threaded base, the seal failed and you replace the valve (a sub-$15 part rated for 150 psi). If water comes from the discharge tube, the valve is correctly relieving excess pressure — the real fix is a thermal expansion tank to control that pressure, not a new valve. Never cap the valve to stop it.
Could it just be condensation, not a leak?
Yes, especially on a new tank or when cold inlet water fills it. Condensation forms on the cold steel, drips, and mimics a leak. The difference is timing: condensation appears when the heater works hard and dries up once the water is hot, while a real leak returns quickly no matter what. Dry it, run hot water, and see if it stays dry.
Can I fix a leak at the anode rod port?
Often yes. A weeping anode port usually means a worn seal or a corroded fitting. Replacing the anode rod and resealing the port typically stops it, and you get the bonus of a fresh anode that extends the tank’s life. If the port threads themselves are badly corroded, have a plumber assess it.
Why is a bottom leak worse than a top leak?
Because a bottom leak is the tank itself. The inner steel has corroded through, and there’s no reliable way to repair a leaking tank body — welding or sealing won’t hold and it only worsens. A top leak, by contrast, is a threaded connection you can tighten or replace. Bottom leak means plan a replacement; top leak usually means a cheap fix.