Fill a 40-gallon tank and you are hanging roughly 330 pounds of water off the wall, most of it up high in a tall steel cylinder. Add the tank itself and the burner assembly and the whole thing runs 400 to 500 pounds when it is hot and full. Shake the floor under it and that top-heavy weight wants to rock. Rock it far enough and it walks off its stand, tips, and shears the rigid gas line at the first threaded joint on the way down. Now raw gas is pouring into a garage next to a burner that is still trying to light. Two metal straps lagged into the studs are what stand between a rattled house and that fire.
Why a full tank is the load that tips
Picture the tank as an engineer would, as a mass on a lever. Water weighs about 8.3 pounds a gallon, so a 40-gallon tank holds around 330 pounds of water alone, and a 50-gallon unit pushes past 400 pounds of water before you count the steel. The tank stands four to five feet tall on a small footprint, and it is full to the top, which means the center of gravity sits high. That is the exact geometry that fails in an earthquake. When the floor jerks sideways, the base moves with it, but the heavy top lags and swings, and the tank pivots. A shove that would slide a squat, low object across the floor instead levers a tall one over.
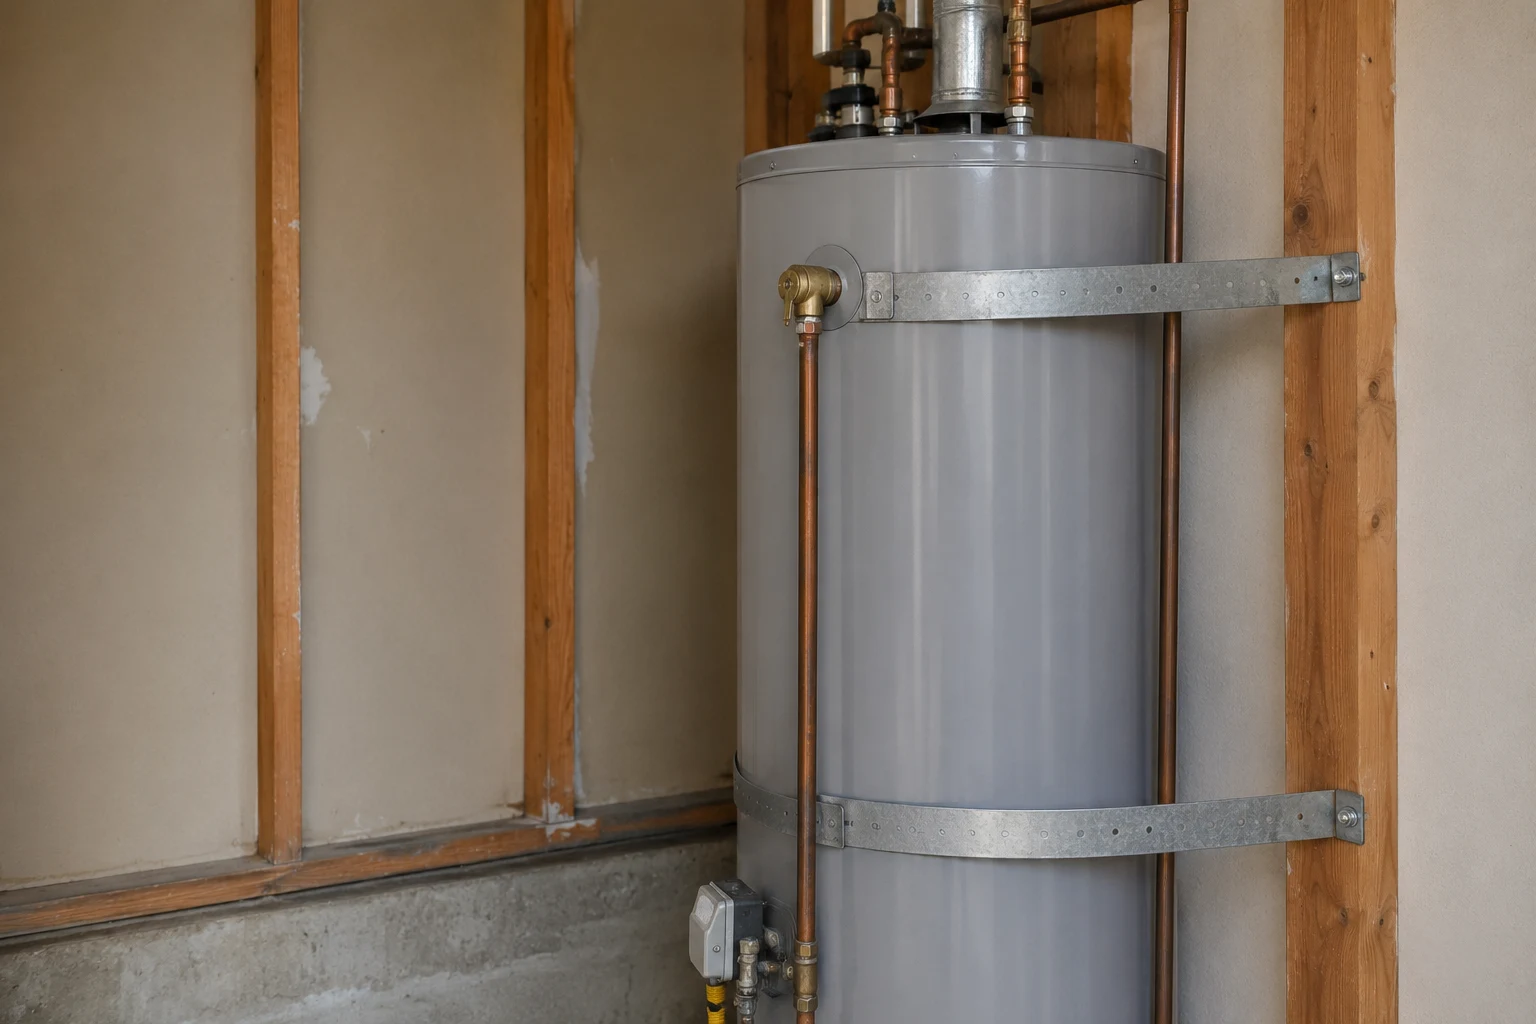
Bolting the base to the floor barely helps, because the failure is not the bottom sliding, it is the top swinging out and gaining leverage. You have to restrain the upper body against something solid, and the only solid thing in reach is the wall framing. That is the whole logic behind two straps. The upper strap catches the heavy top before it can lean out far enough to tip. The lower strap pins the base so the tank cannot skate sideways off its platform and load the connectors. Remove either one and the failure mode is easy to predict. With only a low strap, the top hinges over it. With only a high strap, the base kicks out from under. Both together turn a loose half-ton object into part of the wall, and that is what the code is after.
The code spec, straight
California Health and Safety Code section 19211 is the rule most people run into. It requires that a water heater be braced, anchored, or strapped to resist falling or horizontal displacement from earthquake motion, and the California Plumbing Code fills in the two-strap detail that inspectors actually measure against. The Uniform Plumbing Code carries the same requirement into other adopted seismic design categories, so the Pacific Northwest, Nevada, Utah, and most of the quake belt read from the same page. Here is what the strapping has to be.
| Number of straps | Two required, one upper and one lower |
| Upper strap location | Around the top third of the tank |
| Lower strap location | Around the bottom third, at least 4 in above the controls |
| Strap material | Heavy-gauge steel strap, commonly 16-gauge, or a listed kit |
| Anchors | 1/4 in lag screws penetrating studs at least 1 in |
| Wall type | Wood studs, or masonry with proper anchors, never drywall alone |
| Gas control clearance | Lower strap kept 4 in clear of the thermostat or gas valve |
| Wrap | Strap encircles the tank fully, not tacked to one side |
| Real-estate transfer | Required for sale in many California jurisdictions |
The 4-inch clearance on the lower strap trips people up, so it is worth spelling out. The gas control valve and the thermostat sit low on the front of the tank, and a strap crossing them can pinch the controls or the gas line feeding them. Keep 4 inches of bare tank wall between the strap and the top of the control, and the strap stays out of the way while the valve stays serviceable. An electric tank has no gas valve, but the lower thermostat access panel still needs to stay clear, so the same measurement applies.
Material is where corner-cutting hides. A thin packing strap, a plastic band, or a length of 22-gauge galvanized hanger tape is not earthquake strapping, no matter how tight you crank it. Under a real load it stretches, then tears at the screw hole, and the tank goes over anyway. Code wants heavy-gauge steel, commonly 16-gauge, either sold on its own for the purpose or bundled in a listed kit. The strap has to hold hundreds of pounds of lateral pull without deforming at the lag screw, because the entire point is that it does not give when the tank tries to move.
Find the studs and confirm the anchor holds
Everything about whether this install survives comes down to what the lag screws bite into. A strap is only as strong as the wood behind it, so before any drilling, run this check on the wall.
Sweep for studs
Run a stud finder across the wall behind the tank and mark every stud on both sides. Framing is usually 16 inches on center, sometimes 24. You need solid wood everywhere a strap end will land, so map both the upper and lower strap lines before you commit to a layout.
Check the anchor path
The lag has to pass through the drywall, typically 1/2 inch, and still bury at least an inch of thread in the stud. That is why 1/4-inch lags in the 2-1/2 to 3-inch range are standard. A short screw that only catches the face of the stud, or one that stops in the gypsum, has almost no pull-out strength and will let go the instant the tank loads it.
Add blocking if studs miss
If a stud does not fall where a strap needs to anchor, do not angle the strap or trust drywall anchors. Cut a length of 2x4, lag it across two studs so it spans the gap, and anchor the strap into that blocking. Now the strap pulls against framing again instead of hollow wall.
Verify against masonry
If the tank sits against a block or poured concrete wall, skip the wood entirely and use a masonry anchor rated for the load, set with a hammer drill into solid concrete or a filled cell, not into a mortar joint. Then pull-test the anchor by hand before you trust it.
Installing both straps, step by step
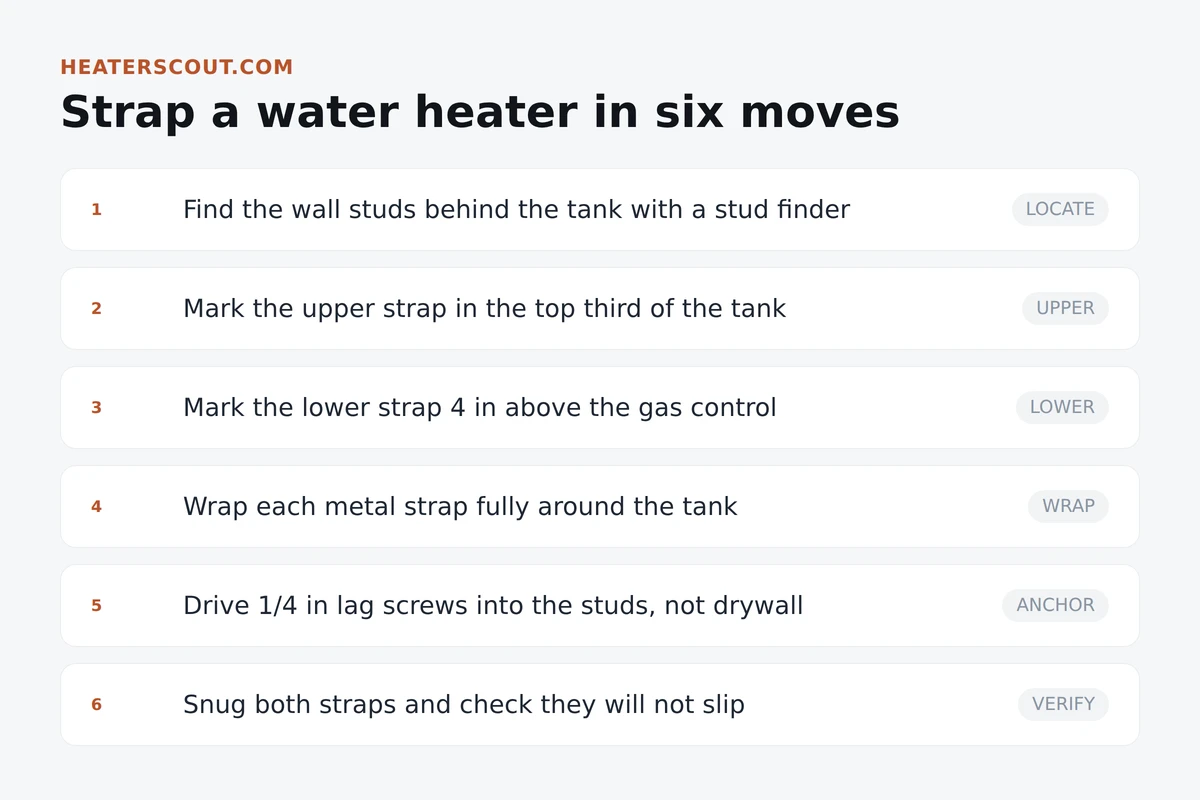
Work top to bottom and settle the tank against the wall first. If there is a gap behind it, shim or block it so the tank sits tight and cannot slide before the straps even load up. Give yourself an hour, and spend most of it on layout and anchoring rather than on driving screws.
A correct install versus the mistakes inspectors flag
Most failed inspections repeat the same short list of shortcuts, and every one of them defeats the purpose in a way that stays hidden until the ground actually moves. Read the right way next to what gets written up.
| Correct | Wrong | |
|---|---|---|
| Straps | Two: upper and lower third | One strap across the middle |
| Anchor | 1/4 in lags into studs or blocking | Screwed into drywall only |
| Lower clearance | At least 4 in above the gas control | Strap pinching the control or line |
| Tension | Snug, tank cannot rock | Loose straps with visible slack |
| Wrap | Encircles the tank fully | Tacked across the front face only |
| Lines | Flexible gas and water connectors | Rigid pipe that shears on movement |
The single-strap job is the one that shows up most. It looks finished, the tank feels held, and it passes a glance from across the garage. But a middle strap gives the heavy top a hinge to lever over, and the heavy top is exactly what you needed to restrain. The drywall-only anchor is just as common and even more useless: the screws pull straight out of the gypsum the moment the tank loads them, so straps that feel rock solid to the hand are pure decoration. The third repeat offender is a strap tacked only across the front. A strap has to encircle the tank to hold it, because a face-only strap does nothing when the tank leans in the other direction.
One more note on why inspectors care so much about this small job. Section 19211 ties strapping to the point of sale, so in many California jurisdictions the water heater gets a look every time a house changes hands. An inspector who finds one strap, or straps into drywall, or a strap crossing the gas control writes it up as a correction that has to be fixed before the deal closes. Doing it right the first time costs the price of a kit and an hour. Doing it wrong costs a re-inspection, a rushed fix under a closing deadline, and the risk that the shortcut was still standing the day a quake hit. None of the measurements are arbitrary. Each one traces back to how a top-heavy tank fails, and the failure they prevent is a gas fire in an occupied house.
Straps hold the tank, flex connectors save the lines
Rigid pipe can crack at a threaded joint even when the tank shifts a fraction of an inch, so strapping alone does not fully close the gas-leak risk. Before you finish, swap the rigid gas line for a flexible corrugated connector and put braided flexible supply lines on the water side. Those let the tank move slightly under shaking without shearing a line, and many jurisdictions expect them alongside the straps. Skip this and a strapped tank can still spring a gas leak from a pipe that snapped where it had no give.
Frequently asked
Is water heater earthquake strapping required by code?
In seismic zones, yes. California requires it statewide: California Health and Safety Code section 19211 mandates that a water heater be braced, anchored, or strapped to resist falling or horizontal displacement from earthquake motion, and the California Plumbing Code carries the two-strap detail. The Uniform Plumbing Code applies the same requirement in adopted seismic design categories, so most earthquake-prone jurisdictions in the Pacific Northwest, Nevada, and Utah enforce it too. Because 19211 ties directly to real-estate transfer, a missing or single strap is a common reason a home sale gets flagged for correction before closing.
How many straps does a water heater need, and where do they go?
Two. One wraps the upper third of the tank, high enough to hold the heavy top but below the flue collar and fittings. The second wraps the lower third and must sit at least 4 inches above the gas control valve or thermostat so it never pinches the controls or the gas line. Both anchor back to wall studs on each side. A single strap across the middle is the most common write-up, because it lets the top of a full, top-heavy tank pivot over the strap like a hinge and tear the rigid gas line.
Why can't I screw the straps into drywall?
Drywall has almost no pull-out strength. A lag screw in gypsum board alone holds a few dozen pounds at best, and a full tank loads a strap with hundreds of pounds of lateral force the instant it starts to move. The screws rip straight out and the strapping does nothing. The lag screws have to bite at least an inch into a wood stud, or into masonry with a proper concrete anchor if the tank sits against a block or poured wall. If the studs do not line up where a strap needs to land, lag a 2x4 across two studs first and anchor the strap into that blocking.
What gauge strap and what size screws should I use?
Use heavy-gauge steel strap, commonly 16-gauge, or a listed earthquake strapping kit; the packing straps and 22-gauge galvanized hanger tape people improvise with are too thin and will stretch or tear at the screw. Anchor with 1/4-inch lag screws long enough to penetrate the stud by at least an inch, which usually means 2-1/2 to 3-inch screws once you account for drywall thickness. Drill a pilot hole for each lag so it starts straight and does not split the stud. A boxed kit gives you the right gauge strap and the right screws together for about $15 to $30.
How much does it cost and how long does it take?
A strapping kit runs about $15 to $30 at any hardware store and usually includes the strap and the lag screws. If you already own a drill and a stud finder, the parts are the whole cost and the labor is roughly an hour of careful work. A plumber doing it as part of a service call adds labor on top, but the materials stay cheap either way. It is one of the least expensive life-safety upgrades in the building, which is part of why code makes it mandatory rather than optional.
Do I still need flexible connectors if the tank is strapped?
Strapping keeps the tank upright, which is the main event, but rigid gas and water pipe can still crack at a threaded joint even when the tank only shifts a fraction of an inch. Adding a flexible corrugated gas connector and flexible braided water supply lines lets the tank move slightly without shearing a line, so a small displacement does not turn into a gas leak. Many jurisdictions expect the flex connectors alongside the straps, and they are an inexpensive add-on while you already have the tank pulled and the connections exposed.
Should the tank be blocked so it can't slide?
Yes. The tank should sit tight against the wall, and if there is a gap you should fill it with wood blocking or shims so the tank cannot slide back and forth before the straps even load up. On a raised platform or in a wide alcove, block the sides too. The straps stop the tank from tipping toward the room, but keeping it snug against solid backing stops the sideways rocking that works screws loose and stresses the connectors over repeated shaking.