You hooked up the hose, opened the drain valve to flush the tank, and got a sad trickle or nothing at all. Either the valve will not turn, or it opens fine and no water follows. Those are two different faults with two different fixes, and chasing the wrong one wastes an afternoon. A valve that will not turn is a dead valve. A valve that opens dry is either a vacuum lock or a passage packed with sediment, and both of those clear in minutes once you know the trick.
Two faults, two fixes, and one real hazard
Before you reach for a tool, get the shape of the job. A drain valve that will not open is one of two separate problems, and the water behind it is hot enough to send you to the ER. These are the numbers that frame the risk and the repair.
Before you start: get set up so a failure is not a flood
Opening an old plastic valve is the moment it can crack, so treat the whole job like you expect it to fail and you will not get caught out. Have the parts on hand before you drain a drop.
- Power off at the breaker (electric) or gas control to Off / Pilot (gas)
- Cold water inlet valve shut at the top of the tank
- Tank cooled a couple of hours, or hot taps run to drop the temperature
- A 3/4-inch brass full-port ball valve, a short brass nipple, and thread tape bought in advance
- Pipe wrench or channel-locks, a stiff wire or coat hanger, a bucket and a hose
- A clear path for scalding water and sediment, well away from your hands
Cool it down and kill the energy before you open anything
The water in the tank is at your thermostat setting, usually 120 to 140 degrees Fahrenheit, and 140-degree water scalds skin in about five seconds. Before you touch the drain valve, cut the power at the breaker on an electric heater or turn the gas control to Off or Pilot on a gas heater, then shut the cold water inlet valve at the top of the tank. Give it a couple of hours to cool if you can, especially before poking anything into the port, because a clog can let go all at once and send a scalding gush straight at your hands. Never work bare-handed right at the discharge stream.
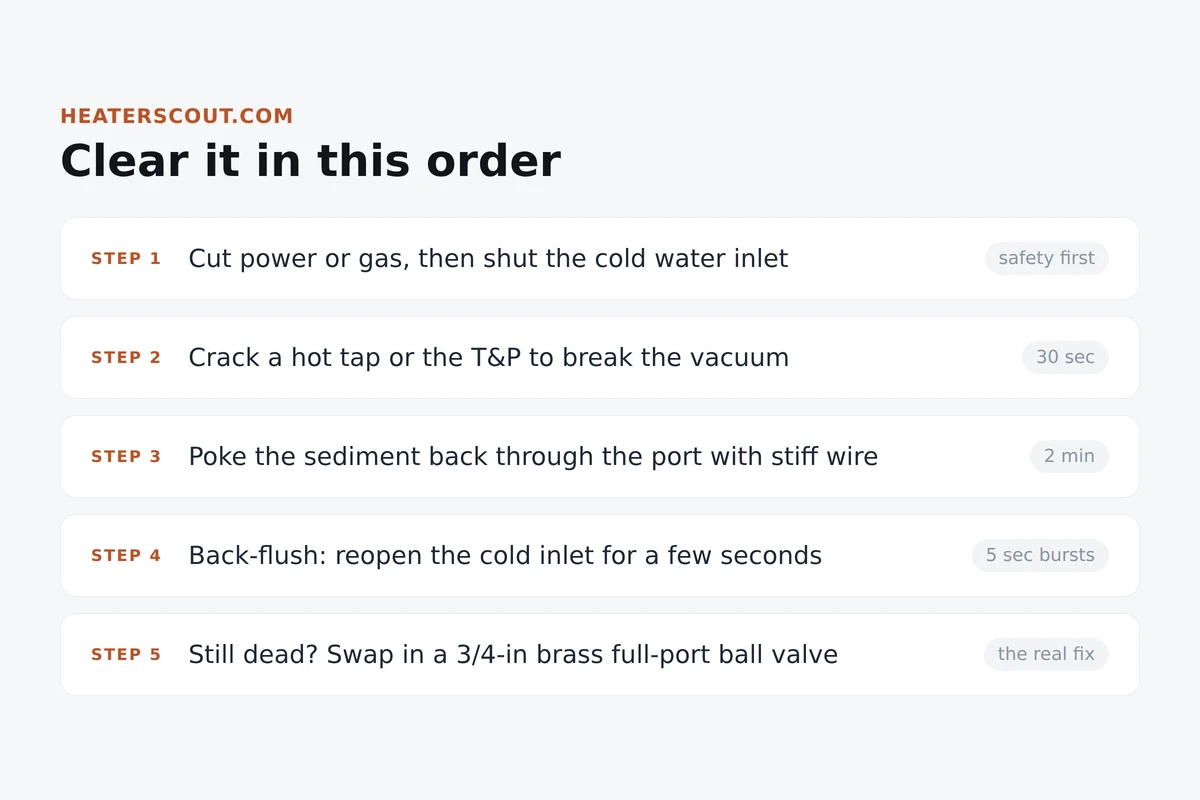
Clear it in order, easiest fix first
Do not jump to pulling the valve. Most stalled drains clear at step two or three. Run the list top to bottom and stop the moment water flows.
Read the handle: which failure did you actually have
The single most useful thing you can do is watch what the handle does. A valve that will not turn has nothing to do with a valve that opens dry. Match your symptom to one of these two columns and work only that side.
The stem will not turn (dead valve)
- Handle is seized and will not budge, or it spins loose with no resistance and no water
- The plastic wheel has stripped off the stem, or corrosion has locked it
- Do not force it: brittle plastic snaps and a snapped drain on a full tank floods
- This valve is finished. The repair is replacement, ideally with a brass ball valve
It opens but nothing flows (vacuum or clog)
- Handle moves to open normally, you get a trickle or dead silence
- First suspect: vacuum lock. Break it by opening a hot tap or the T&P lever
- Second suspect: sediment plug walling the drain port shut from inside
- Fix lives behind the valve. Wire the port, back-flush, or pull the valve to clear it
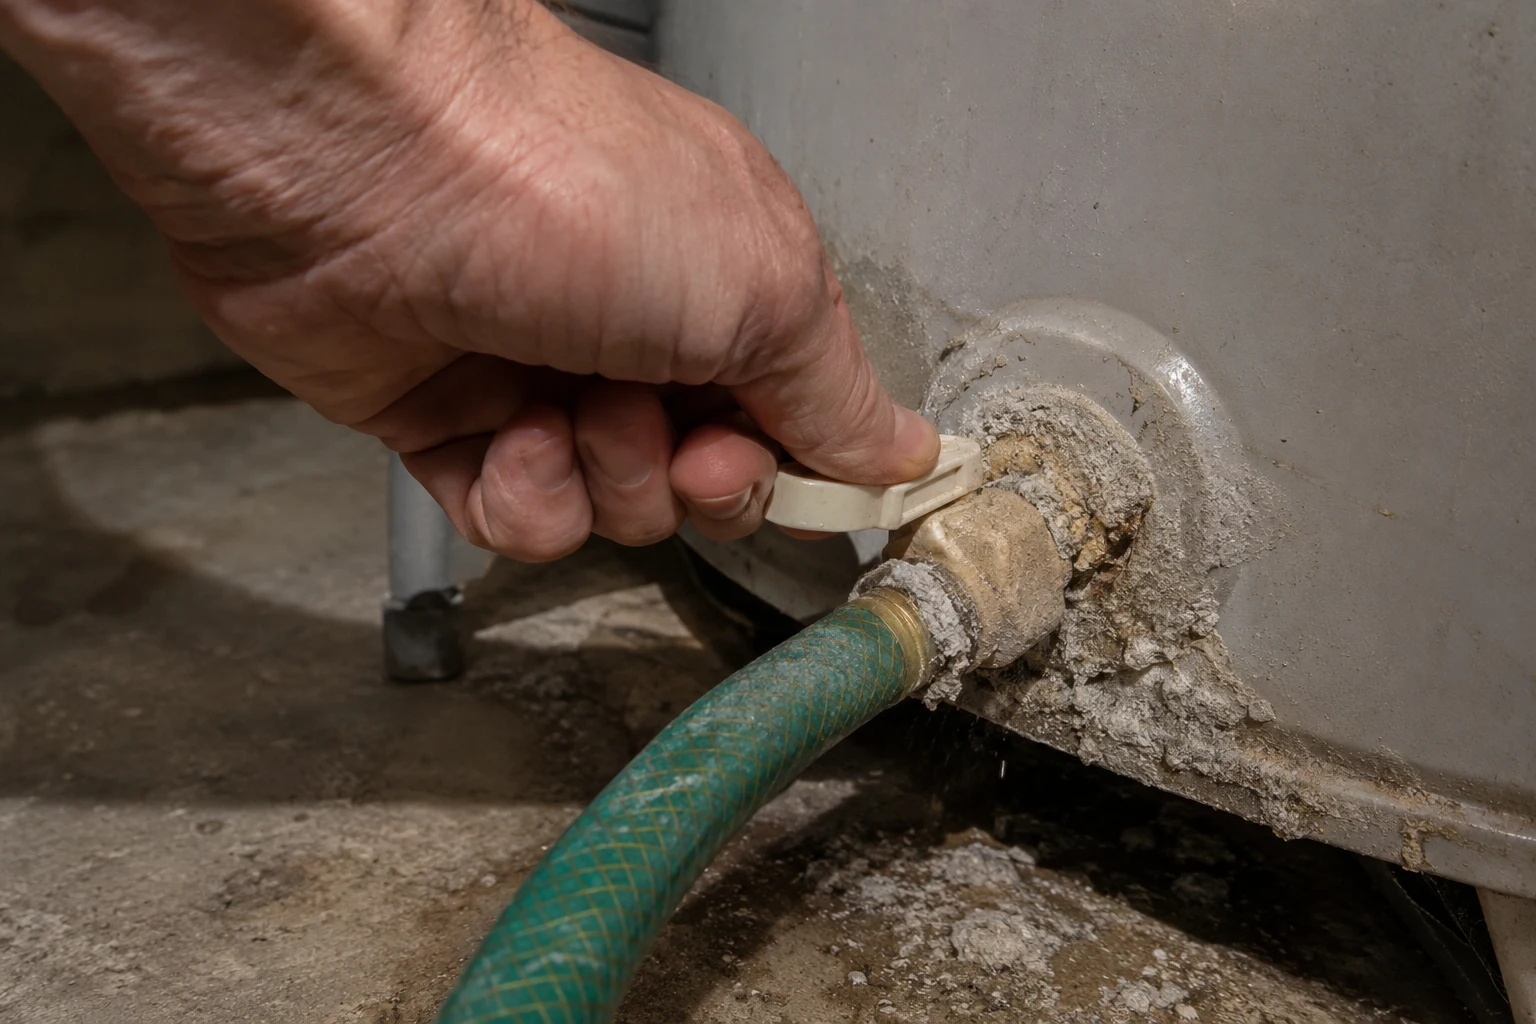
Break the vacuum, clear the passage, and only then judge the valve. If the stem was dead or the plastic cracked while you worked it, you were going to be replacing it anyway, and the brass ball valve you thread on in its place is the part that keeps next year's flush from starting the same way.
Frequently asked
My water heater drain valve is open but nothing is coming out. What is wrong?
You have one of two problems, and they call for different fixes. The first is a vacuum lock. Water will not flow out of the bottom of a sealed tank unless air can get in at the top, so if the drain valve is fully open and dead quiet, go open a hot faucet somewhere in the house or lift the T&P valve lever for a second to let air in. Nine times a stalled drain starts flowing the instant you break that vacuum. The second problem is a sediment clog. On a tank that has never been flushed, years of hardened calcium pile up on the floor right where the drain port sits, and the pile can wall the opening shut. The valve turns fine, but the passage behind it is packed. That one you clear by poking a stiff wire back through the port from the outside, or by back-flushing with the incoming water pressure. Rule out the vacuum first because it costs nothing and takes ten seconds.
How do I tell a stuck valve stem from a clogged drain passage?
Watch what the handle does. A stuck stem will not turn, or it turns and turns with no resistance and no water, because the plastic wheel has stripped off its stem or the stem is seized with corrosion. A clogged passage is the opposite: the valve opens normally, you feel it move to the open position, and you get a trickle or nothing because the sediment behind it is blocking the path. The tell is whether the mechanism moves freely. If the handle spins loose, the valve itself is dead and needs replacing. If it opens like it should but the water will not come, the fix lives behind the valve in the tank, and you clear the passage rather than the valve. Do not force a stem that will not turn on an old plastic valve. Brittle plastic snaps, and a snapped drain valve on a full tank is a flood.
Can I poke a wire into the drain valve to clear the sediment?
Yes, and it is one of the most reliable fixes for a clogged plastic valve. With the drain open and a bucket or hose ready, work a stiff wire, a straightened coat hanger, or a small flat screwdriver in through the outlet and back toward the tank, twisting as you push. You are trying to break the calcium plug loose and shove it back into the tank so water can push it out. When the plug lets go you will usually get a sudden gush of dirty water and sediment, so be ready for it and keep your hands clear of the stream because it is scalding hot if the tank has not cooled. Work gently on a plastic valve. Jamming a screwdriver hard into a brittle old valve is how you crack the body and turn a clog into a leak you cannot shut off.
Should I replace the plastic drain valve with a brass ball valve?
If the valve has already failed you or you are flushing an older tank, upgrading to a brass full-port ball valve is the move most plumbers make. The stock plastic drain valve on a Rheem or A.O. Smith tank is a cost-cut part. It warps from heat, the little wheel strips, the seat stops sealing after you open it once, and its narrow passage clogs with the exact sediment you are trying to flush. A 3/4-inch full-port brass ball valve threads onto the same 3/4-inch port, opens to a wide bore that lets chunks of scale pass instead of jamming, and a quarter-turn lever is far easier to work than a twisty plastic wheel. Flip the lever a few times during a flush and it chops through mineral globs that would clog the old valve solid. Buy the valve, thread tape, and a short brass nipple before you start so you are not standing at a drained tank with no part in hand.
Is the water dangerous when I open the drain valve?
It can scald you badly. The water inside the tank sits at whatever your thermostat is set to, commonly 120 to 140 degrees Fahrenheit, and water at 140 degrees causes a serious burn in about five seconds. Before you open anything, cut the power at the breaker on an electric unit or turn the gas control to Off or Pilot on a gas unit, then shut the cold water inlet valve at the top. The safest move is to let the tank sit and cool for a couple of hours first, especially if you are going to be poking a wire near the outlet where a sudden gush can hit your hands. If you cannot wait, run the hot taps in the house for a while to pull the hottest water out and drop the tank temperature before you drain. Never work with bare hands right at the discharge stream.
What if the old plastic valve snaps or leaks after I mess with it?
Have the replacement plan ready before you touch a corroded plastic valve, because on old tanks that is a real outcome. Brittle plastic that has baked for a decade can crack when you turn it or when you poke a clog loose, and once it fails to reseat you have water running out of a full tank with no way to stop it. That is why you shut the cold inlet first and, if you can, drain the tank down before doing anything aggressive to the valve. If it does snap, you drain the tank the rest of the way through whatever opening you have, unthread the broken valve with a pipe wrench using steady even pressure so you do not shear plastic off inside the port, and thread in a brass replacement with fresh tape. Buying the brass ball valve up front turns a scary failure into a planned upgrade you were going to do anyway.
Do I need to remove the whole valve to clean it?
Sometimes, and it is the step you take when breaking the vacuum, wiring the port, and back-flushing all fail to get flow. Drain the tank as far as it will go first, then unthread the valve. On the bench you can see exactly what is blocking it, clear the passage, and check whether the seat still seals. Most of the time, once you have gone this far, you do not bother cleaning the old plastic valve at all. You thread on a brass full-port ball valve instead, because a valve that clogged once and forced you to pull it will clog again. Removing the valve on a tank you cannot fully drain is a wet job, so shut the cold inlet, open the T&P to relieve pressure, and expect the remaining water to come out when the threads break loose.