A Takagi that flashes 321 is not telling you the water is too hot or too cold. It is telling you it has lost its sense of the incoming water temperature entirely. The board reads a small sensor at the cold water inlet to decide how hard to fire the burner, and when that sensor goes open or shorted the unit throws code 321 and stops. The part at fault is usually a temperature probe about the size of a AA battery, and the repair is often a reseated connector or a $30 sensor, not the board that scares people into calling a pro.
Is 321 the same as the other 3-series thermistor codes?
Not quite. Takagi bundles 311, 321, 331, and 341 as thermistor failures in one handbook section, but each points at a different sensor. 311 is the outlet thermistor on the hot side, 321 is the inlet thermistor on the cold side, 331 is the heat-exchanger thermistor, and 341 is the exhaust thermistor. If you are chasing 321, you want the sensor at the incoming water connection, not the hot outlet or the flue. A handful of model lines shuffle these assignments, so confirm against the code table for your exact unit before ordering.
Takagi code 321
An inlet thermistor failure. The control board reads the incoming water temperature sensor as open (broken wire or probe) or shorted, so it cannot trust the temperature of the cold water entering the heater. Without a valid inlet reading the board cannot calculate the correct firing rate, so it locks out. On the indoor T-H3 and 540 line this code is specifically the inlet sensor, distinct from 311 (outlet), 331 (heat exchanger), and 341 (exhaust).
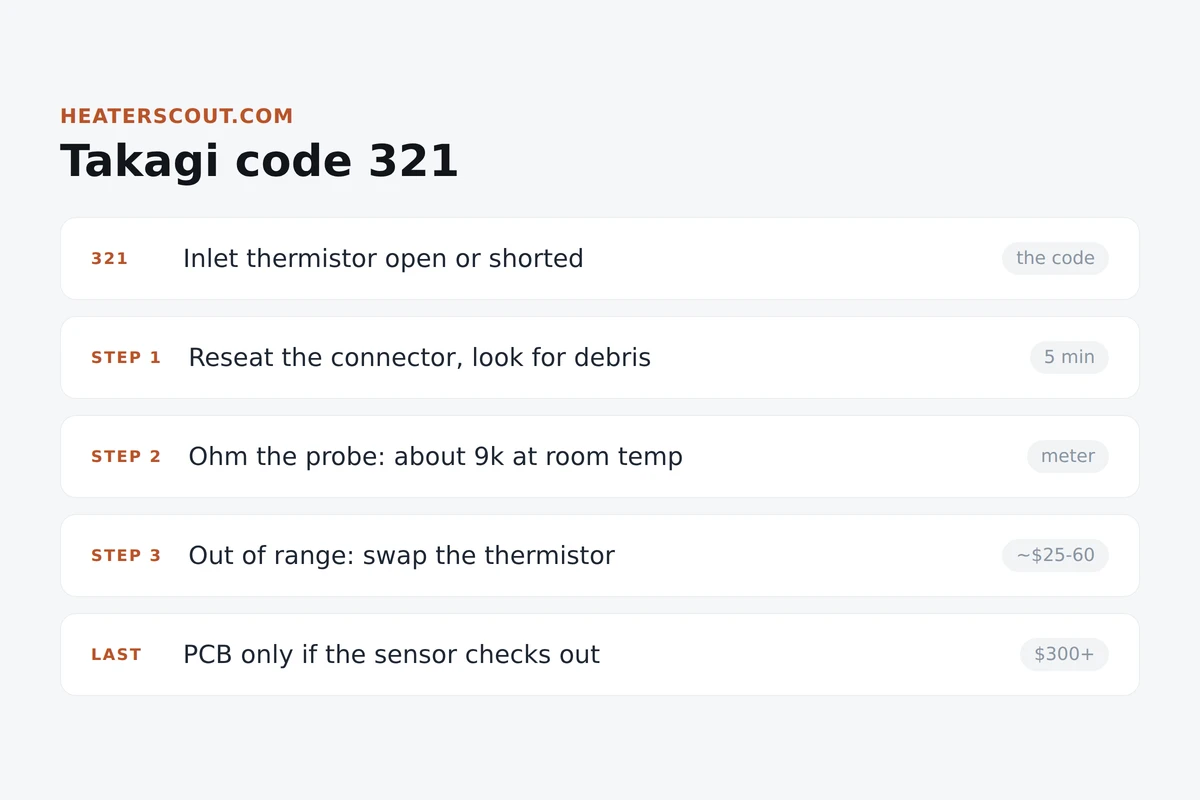
Why the inlet reading matters so much
Understanding what the sensor does makes the code make sense. A tankless heater has no tank of pre-warmed water to lean on. Every time you open a hot tap it has to raise the water from whatever temperature it arrives at, right now, to your setpoint, in the seconds it takes to travel through the heat exchanger. To do that it needs two numbers: how cold the water is coming in, and how hot it is going out. The inlet thermistor supplies the first. In February that incoming water might be 45 degrees; in August it might be 70. That 25-degree swing changes how hard the burner has to work by a lot. If the board loses the inlet reading, it is being asked to hit a target with no idea of the starting point, so it refuses and reports 321. A thermistor is a resistor whose resistance changes with temperature, and a healthy Takagi unit reads roughly 9k ohms at room temperature, dropping as the water warms.
What to check first
Work the cheap causes before you spend a dime. Most 321 faults are the connection or the probe, not the board. Kill power at the breaker before you open the cover.
- Cut power at the breaker or unplug the unit, then remove the front cover.
- Find the inlet thermistor at the cold water inlet connection, trace its wire to the harness.
- Unplug the thermistor connector and look for green corrosion, backed-out pins, or a burnt terminal.
- Inspect the probe for scale, debris, or mineral film that can skew or block the reading.
- Follow the wire for chafes, pinches, or a break where the harness flexes or crosses an edge.
- Reseat the connector firmly, clean any debris off the probe, then power up and watch for the code.
| Code meaning | Inlet thermistor failure (open or shorted) |
| Sensor location | Cold water inlet connection |
| Related codes | 311 outlet, 331 heat exchanger, 341 exhaust |
| Model line noted | Indoor T-H3 / 540 series |
| Nominal resistance | About 9k ohms at room temperature |
| Open reading | Broken probe or wire (infinite ohms) |
| Shorted reading | Damaged probe or pinched wire (zero ohms) |
| Reset method | No dedicated button; 30-second power cycle to clear |
| OEM thermistor part | Common Takagi parts 407 / 408 / 411 / 718 |
| Control board part | Part 701 (last resort, most expensive) |
| DIY thermistor cost | About $25 to $60 for the sensor |
| Pro repair range | About $150 to $300 diagnose and swap |
| Difficulty | DIY-friendly with a multimeter |
Diagnostic order when a reseat does not hold
If 321 survives cleaning the probe and reseating the connector, stop guessing and put a meter on it. The resistance reading separates a bad sensor from bad wiring from a bad board.
Ohm the thermistor cold
With power off and the connector unplugged, measure resistance across the two sensor pins. At room temperature you want to see roughly 9k ohms. Zero means a short, infinite means an open, and either one throws 321. A reading near spec means the sensor itself is probably fine.
Warm the probe and watch it move
Hold the probe in your hand or dip it in warm water and watch the resistance. A healthy thermistor drops smoothly as it heats. A number that sticks, jumps, or flips to open or short as it warms is a failing sensor that a single cold reading can miss.
Test the harness continuity
If the sensor reads correct, check the wire from the thermistor connector back to the board for continuity, one lead each side. An open or intermittent wire mimics a dead sensor. Wiggle the harness while you watch the meter to catch a break that only opens under movement.
Replace the inlet thermistor
If the probe is out of spec, pitted, or reads unstable, fit the correct genuine Takagi thermistor for your model, one of parts 407, 408, 411, or 718 depending on unit. This is the honest fix for a confirmed bad sensor and the most common cure for 321.
Suspect the control board last
Only after the sensor, the connector, and the wiring all check out do you consider the PCB, part 701. A board misreading a good sensor is real but uncommon, and it is by far the most expensive part in the heater. Confirm everything upstream before you spend on it.
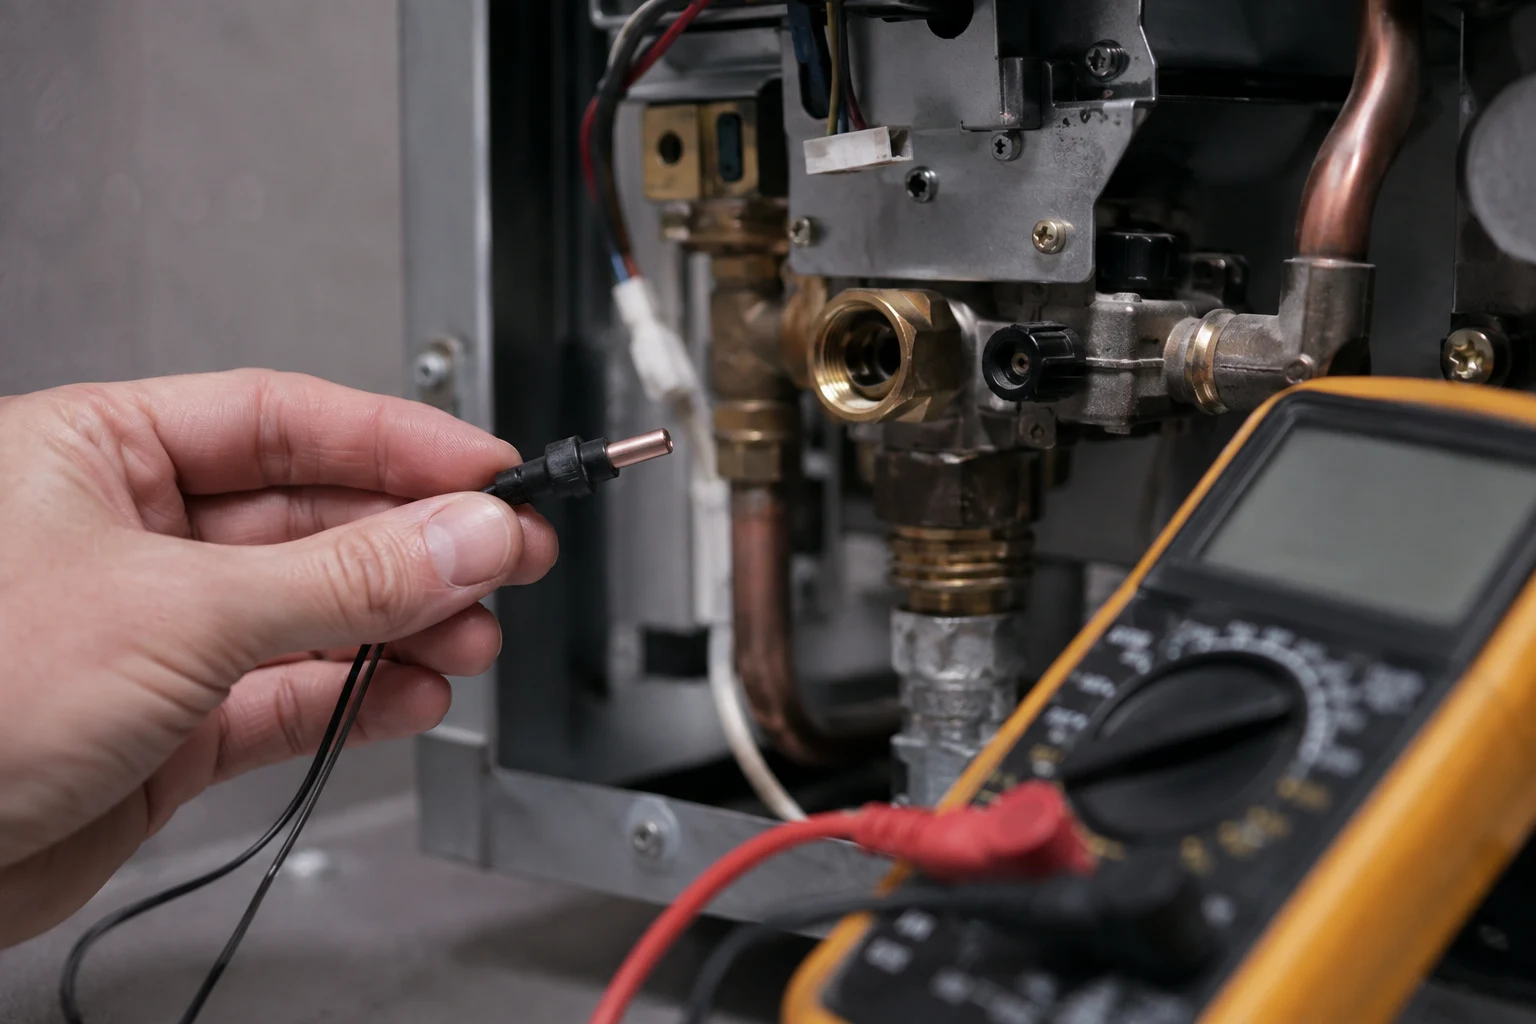
Where the homeowner line sits
Testing and swapping the inlet thermistor is fair game for a careful homeowner who owns a multimeter and is comfortable cutting power and opening the cover. It is a screwdriver, a meter, and a $30 part. Nothing here touches the gas train or combustion tuning, which is what keeps 321 firmly on the DIY-friendly side of the line. The place to stop is the control board. If the sensor ohms out fine, the wiring passes continuity, and 321 still returns, the reading circuit on the PCB is the remaining suspect, and diagnosing a board against the model service sheet is a tech's job. Never bypass or jumper the thermistor to force the unit to run. That sensor exists so the heater does not fire blind and cook or shortchange the water it sends you.
Keeping 321 from coming back
An inlet thermistor fails from three things: age, water quality, and a wiring connection that works loose over years of thermal cycling. You cannot stop the sensor from aging, but you can keep the inlet clean. Most Takagi units have a screen filter at the cold water inlet; pull and rinse it at your annual service so debris does not coat the probe. While the cover is off, reseat the thermistor connector and look for the first hint of corrosion, because catching a green pin early beats chasing an intermittent 321 on the coldest morning of the year. Descaling on schedule keeps the exchanger healthy even though it does nothing for the sensor directly, and a unit that gets a yearly look-over rarely surprises you with a sensor code out of nowhere.
Frequently asked
Can I reset Takagi error code 321 myself?
There is no dedicated reset button for 321 the way some brands give you a red button, and Takagi's service handbook does not list a reset step for thermistor faults. You can clear the latched code by cycling power: turn the unit off at the remote controller, shut the breaker or unplug the heater for about 30 seconds, then restore power. That drops the current fault so you can watch it come back or stay gone. But clearing is not fixing. Code 321 means the board cannot read the inlet water temperature sensor, so if the probe or its wiring is bad the code returns the next time the unit powers up or calls for hot water. Use the power cycle to confirm your repair worked, not as the repair itself.
What thermistor does Takagi code 321 point to?
On the indoor T-H3 and 540 line, 321 is the inlet thermistor, the sensor that reads the temperature of the cold water entering the heater. Takagi groups four thermistor faults together in its handbook and splits them by sensor: 311 is the outlet thermistor on the hot side, 321 is the inlet thermistor, 331 is the heat-exchanger thermistor, and 341 is the exhaust thermistor. If you see 321, look at the sensor clipped into or threaded near the cold water inlet, not the hot outlet. On a few model lines the sensor assignments shift, so cross-check the code table on the maintenance sheet taped inside your unit's cover or the handbook for your exact model before you order a part.
How do I test the inlet thermistor on a Takagi?
A thermistor is just a temperature-dependent resistor, so you test it with a multimeter on ohms. Cut power to the unit, unplug the inlet thermistor connector from its harness, and measure resistance across the two pins on the sensor side. At normal room temperature a healthy Takagi thermistor reads in the ballpark of 9k ohms. A reading of zero or a dead short means the probe is shorted. An infinite or open reading means the sensor or a wire is broken. Both throw 321. Warm the probe in your hand or with warm water and the resistance should drop smoothly as it heats. A number that never moves, or one wildly off from spec, condemns the thermistor. If the sensor reads fine but the code stays, the fault is in the wiring or the board.
How much does it cost to fix Takagi code 321?
If it is debris on the probe or a loose connector, the fix is free beyond your time. A replacement Takagi inlet thermistor is an inexpensive part, commonly in the $25 to $60 range depending on model and whether it comes as a bare sensor or a pigtail assembly. Doing the swap yourself keeps it there. A plumber's visit to diagnose and replace the sensor typically lands around $150 to $300 once you count the trip and labor, more in high-cost metros. The expensive outcome is the control board, part number 701 on many Takagi units, which can run $300 or more for the part alone. That is why you ohm the sensor and check the wiring before anyone touches the board. The thermistor fails far more often than the PCB.
Will descaling clear Takagi code 321?
No. Descaling flushes vinegar or a descaling solution through the heat exchanger to strip mineral scale off the waterways, and it is worth doing on schedule. But code 321 is an electrical sensor fault, not a flow or scale problem. The inlet thermistor reads temperature; it does not care whether the exchanger is scaled. A descale will not touch a broken wire, a corroded connector, or a shorted probe. That said, a unit that has gone years without a flush has often gone years without any service, so while you have the cover off chasing 321 it is a fair time to inspect the sensor, clean debris off the probe, and check the inlet screen filter. Just do not expect the descale itself to clear the code.
Why does Takagi code 321 keep coming back?
A code that returns after you cleared it means the real fault is still live. The usual repeat offenders: the connector was reseated but a pin is corroded or backed out, so the signal drops intermittently. Or the wire has a hidden break or a chafe against a sharp edge that opens the circuit when the harness moves. Or the probe reads borderline, drifting in and out of spec as it heats and cools, which a one-time room-temperature ohm check can miss. Measure the resistance cold, then again warm, and watch for a jump to open or short. If the sensor and wiring both check out and 321 still cycles back, the reading circuit on the control board is the remaining suspect, and that is the point where a tech with the model service sheet earns the call.
Is Takagi error code 321 dangerous?
The code itself is a protective lockout, not a hazard. The inlet thermistor tells the board how cold the incoming water is so it can set the right firing rate to hit your target temperature. If that reading is missing or nonsense, the unit refuses to run or runs poorly rather than guess and risk scalding or undershooting. So 321 shutting the heater down is the safety system working. What you should not do is bypass or jumper the sensor to force the unit to fire, because then the board is heating water blind. The fault is low risk to deal with since it is on the water and electronics side, not the gas side. If you ever smell gas or see anything scorched at the wiring while you are in there, stop and get a licensed tech on it.