Rinnai code 31 is not about hot water flow or venting, whatever a few generic error charts online tell you. Rinnai's own tech sheets are consistent: 31 is a burner sensor fault. The control board is reading the sensor on the burner assembly, and the signal it gets back does not make sense. Open, shorted, out of range, or just not matching what the board expects while the unit fires. On most Rinnai lines that is a hard lockout, so the burner shuts down and stays down until the circuit checks out. The good news is the usual fix is a cheap part and a wiring check, not a major repair.
Which situation are you in
Code 31 shows up in a few recognizable patterns, and the pattern usually tells you how deep the problem goes. Match yours to one of these before you start pulling the cabinet apart.
Older unit, fouled sensor
A heater that has run for years and starts throwing 31. The burner sensor rod has corroded or picked up soot and condensation, and its reading drifted out of spec. Inspect and clean the tip first, then measure it. A sensor swap clears most of these.
31 returns immediately
You power-cycled and the code came right back on the next firing. That is a physical fault, not a stuck code. The sensor, its wiring, or the connector has a real problem. Stop resetting and start inspecting the circuit.
Loose or damaged wiring
The code appeared right after someone worked on the unit, or after it was moved. A sensor connector left half-seated, a pinched wire, or a bumped ground will read as 31. Check the connections that were recently disturbed before you condemn the part.
Board is misreading
The sensor tests within spec, the wiring is clean and tight, the ground is solid, and 31 still shows. The remaining suspect is the control board reading a good sensor wrong. That is a tech call and a meter test against Rinnai's spec before spending on a PCB.
Sensor fault vs. wiring fault: telling them apart
Almost every code 31 traces to one of two things: the sensor itself has gone bad, or the wiring between the sensor and the board has. They look identical on the display and both throw the same code, but they feel different once you start testing, and knowing which one you have keeps you from buying a part you did not need.
The sensor rod is bad
- Comes on gradually as the tip corrodes, soots up, or films over with scale and condensation.
- The sensor measures out of Rinnai's resistance range even with the connector reseated and clean.
- Cleaning the tip may help briefly, but a rod that reads wrong on the meter needs replacing.
- Fix: swap the burner sensor, a $20 to $80 part, then confirm the reading is back in spec.
The wiring or connector is bad
- Often shows up suddenly, right after service, a move, or vibration loosened a connector.
- The sensor itself measures fine at its terminals; the problem is between it and the board.
- Look for a half-seated connector, a chafed or pinched wire, a corroded terminal, or a weak PCB ground.
- Fix: reseat and clean the connector, repair the damaged run, and confirm the ground before buying a sensor.
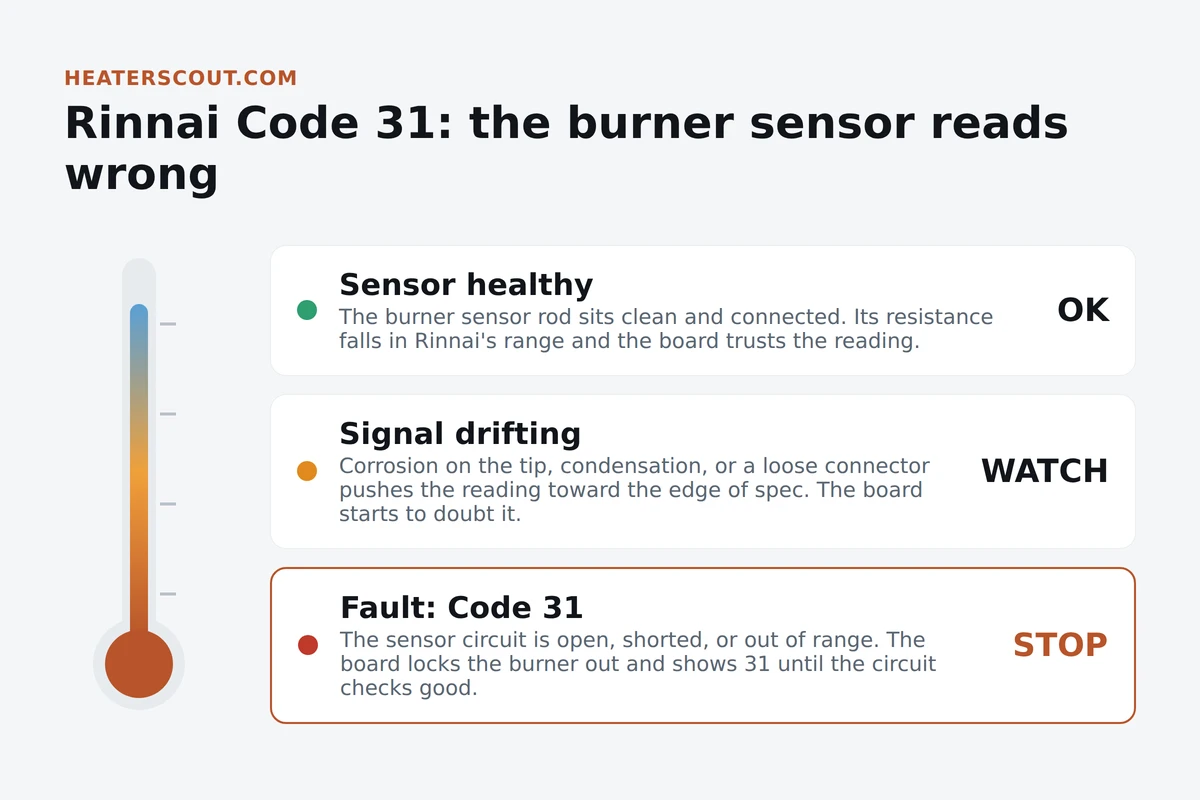
Work the fix in order
The sensor circuit is short, so you can chase it methodically from the cheapest, most likely fault down to the board. Kill power and gas before you open the cabinet. If you are not comfortable inside the unit with a multimeter, do the power-cycle test, check what you can see, and hand the measurement work to a licensed tech; a burner sensor is cheap, but a wrong diagnosis on the gas train is not worth the risk.
1. Power cycle once to rule out a glitch
Turn the unit off at the controller or unplug it, wait about a minute, and power it back up. Run hot water and watch for the code. If 31 clears and stays gone, it was a momentary fault. If it comes right back on the next firing, the circuit has a real problem and you move to the physical checks.
2. Inspect and clean the burner sensor
With power and gas off, access the burner assembly and find the sensor rod. Look at the tip for corrosion, soot, or a white film of scale and condensation. A fouled tip reads wrong. Clean it gently with fine abrasive or a scrub pad until the metal is bright, and check that the rod is not cracked, bent into the burner, or loose in its mount.
3. Check the sensor wiring and connector
Follow the sensor wire back to the control board. Reseat the connector fully, and inspect the run for chafing, pinch points, melted insulation, or corrosion at the terminals. A connector left half-seated after a service call is a classic 31. Wiggle-test it: if the code changes as you move the harness, you found a loose connection.
4. Confirm the PC board ground
A poor ground on the control board can make a good sensor read wrong. Find the board ground wire, confirm it is tight and clean at both ends, and check the unit is properly grounded at the supply. This is easy to overlook and it explains a share of 31s that survive a sensor swap.
5. Measure the sensor resistance against spec
This is meter-and-manual territory. Disconnect the sensor and measure its resistance, then compare the reading to the value in the tech sheet for your exact model. Out of range means the rod is bad and needs replacing. In range with a clean, tight circuit and the code still showing points past the sensor.
6. Replace the sensor, then suspect the board
If the rod measured out of spec, install a new burner sensor, restore power and gas, and confirm 31 is gone. If the sensor and wiring both check good and 31 persists, the control board is misreading a healthy sensor. Confirm that with a tech before spending on a PCB, since a board is the most expensive part in this chain.
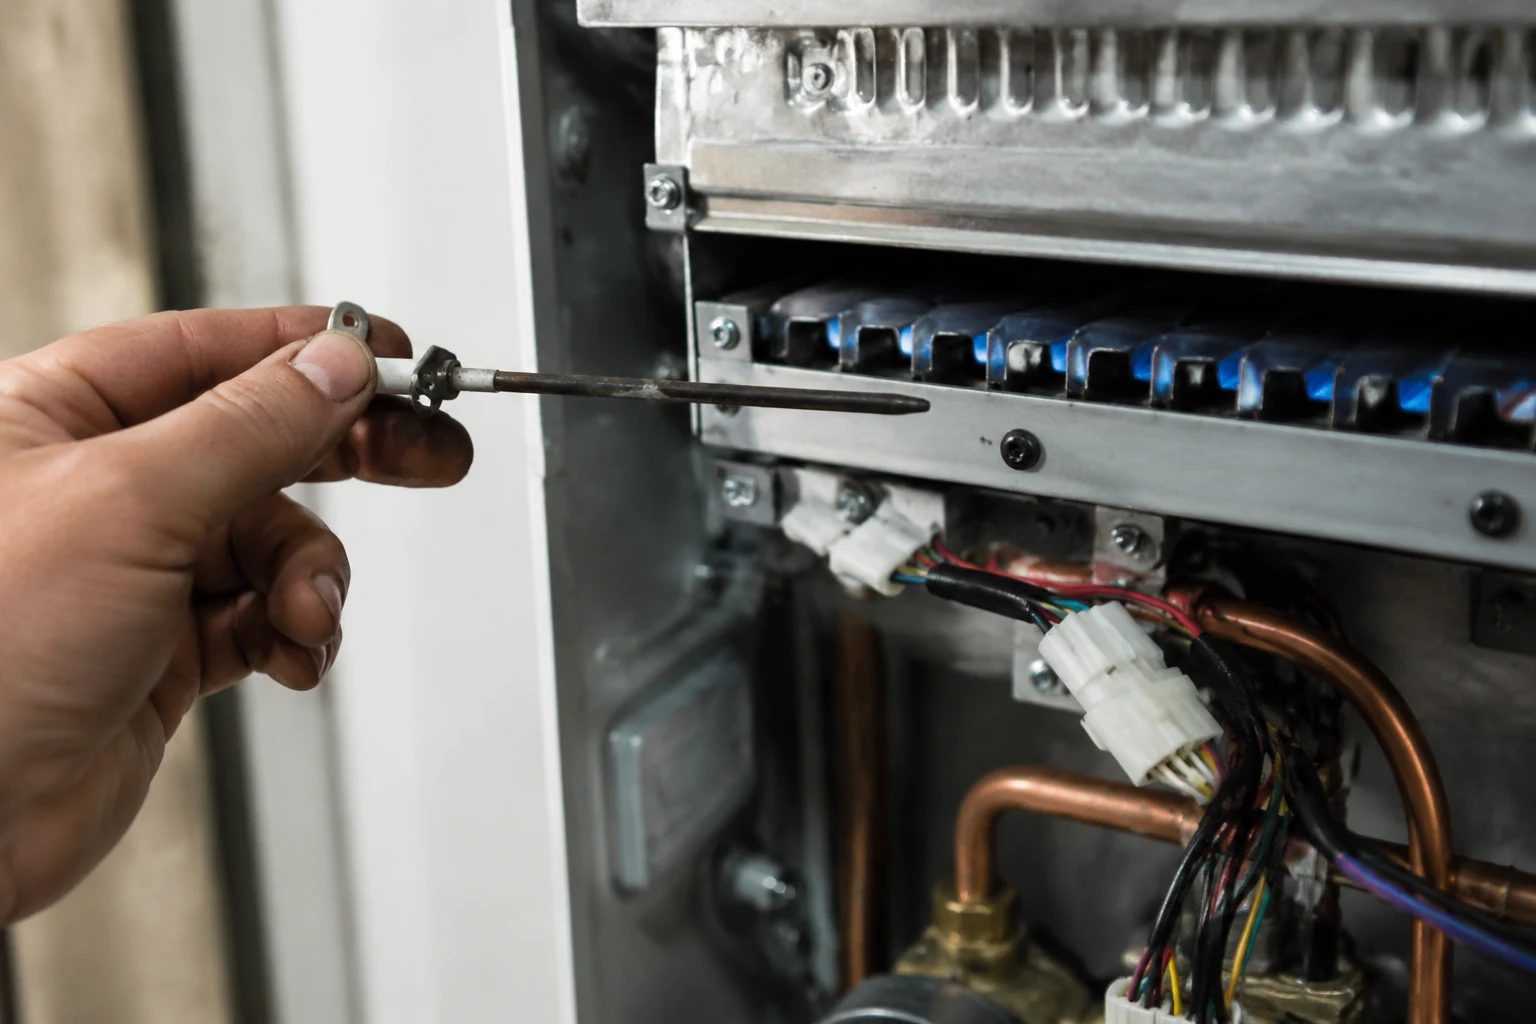
What the burner sensor actually does
Before you condemn it, it helps to know what the board is asking the sensor for. That is what code 31 is really about: a conversation between the sensor and the control board that stopped making sense.
Burner sensor (flame-sensing rod)
A metal rod mounted at the burner that lets the Rinnai control board confirm what is happening during firing. The board reads the sensor's signal, expecting a value inside a defined range. When that reading drifts out of range, drops out entirely, or shorts, the board can no longer trust what it knows about the burner and it throws code 31. Because a gas appliance has to be certain about the burner before it keeps firing, an unreadable sensor is treated as a lockout, not a warning. The rod itself is a low-cost part; the value is in the information it gives the board, which is why a wrong reading stops the whole unit.
Before you open the cabinet
Half of a code 31 call is ruling out the quick stuff so you do not order a control board for a loose connector. Run this list first. It sorts the clean-the-sensor cases from the ones that need a meter and a tech, and it keeps you from replacing a part that tests fine.
- Did 31 come back immediately after a power cycle? That means a physical fault, not a stuck code, so start inspecting the circuit.
- Is the burner sensor tip corroded, sooted, or filmed with scale? A fouled tip reads wrong and often just needs a good cleaning.
- Is the sensor connector fully seated? A half-seated plug left after a service call is a classic cause of 31.
- Is the sensor wire chafed, pinched, or melted anywhere along the run? Damaged wiring reads the same as a bad sensor.
- Is the PC board ground tight and clean at both ends? A poor ground makes a good sensor look faulty.
- Did the code appear right after service or a move? Then check the connections that were recently disturbed before anything else.
- Does the sensor measure inside Rinnai's resistance spec for your model? Out of range means replace the rod; in range points past it.
- Does a generic online chart say 31 is venting or overheat? Ignore it and trust your model's tech sheet, which lists 31 as the burner sensor.
Frequently asked
What does Rinnai error code 31 mean?
Code 31 is a burner sensor fault. Rinnai's control board watches a sensor on the burner assembly, and 31 means the signal from that sensor circuit is out of range: the board is reading an open, a short, a resistance that does not match spec, or a value that does not line up with what it expects while the unit fires. On most Rinnai lines it is a hard lockout, so the burner shuts down and the unit will not run again until the circuit reads correctly. A note on conflicting information: a handful of generic error-code lists online tag 31 as a venting or overheat problem. Rinnai's own tech sheets do not. The manufacturer documentation for the residential tankless lines lists 31 as the burner sensor, with the fix being to measure the sensor resistance and check its wiring and the board. Trust the tech sheet for your model number over a generic chart.
Can I reset Rinnai code 31 myself?
You can try a power cycle, and it is worth doing once, but do not expect it to hold. Turn the unit off at the controller or unplug it, wait about a minute, then power it back up and run hot water. If 31 was a one-time glitch or a momentarily loose connector that reseated, it may clear. If the sensor, its wiring, or the board actually has a problem, 31 comes right back the moment the burner tries to fire, because the fault is physical, not a stuck code. That is the tell: a code that returns immediately after a reset is pointing at hardware, and the next step is to inspect and measure the sensor circuit rather than keep clearing the display.
What is the most common cause of Rinnai code 31?
A bad or fouled burner sensor rod, with a wiring or connector problem a close second. The sensor tip lives in a hot, sometimes damp environment, and over years it corrodes, picks up soot, or gets a film of scale and condensation that throws off its reading. The wire back to the board can loosen at the connector, chafe against a bracket, or corrode at the terminal. Both show up as an out-of-range signal and both throw 31. Further down the list are a poor ground on the PC board and, less often, a control board that is misreading a sensor that is actually fine. Because those last two need meter work and Rinnai's spec sheet, they are where a homeowner hands off to a tech.
Is Rinnai code 31 dangerous?
The lockout itself is the safe response. A gas appliance needs to trust what it knows about the burner, and when the sensor circuit stops making sense, shutting the burner down is the correct move. What you should not do is defeat it. Do not jumper the sensor circuit, force the unit past the code, or ignore a 31 that keeps returning, because the sensor is part of how the heater confirms it is burning gas cleanly and safely. If the reading is wrong, the board has lost a piece of information it relies on. Let it stay locked out, find the fault, and put the sensor circuit back to a reading Rinnai's spec agrees with.
How much does it cost to fix Rinnai code 31?
The common repair is inexpensive as tankless repairs go. A burner sensor or flame-sensing rod is usually a $20 to $80 part. If you can access the burner and are comfortable with the swap and a multimeter, the job is parts plus an hour. A professional diagnosis and sensor replacement typically runs $150 to $350, most of which is the trip and the labor to open the cabinet, test the circuit against Rinnai's resistance spec, and confirm the fix. If the trouble turns out to be the control board rather than the sensor, the cost jumps: a PCB is often $250 to $500 for the part, and installed you are commonly in the $400 to $700 range. That is why a tech measures before replacing anything.
Why does Rinnai code 31 keep coming back?
Because the underlying circuit is still out of spec. If you cleared the code but the sensor is corroded, the wire is loose, or the connector is dirty, 31 returns the next time the burner fires, because the board reads the same bad signal again. The loop is the diagnosis: a code that will not stay gone is telling you the hardware has not been touched. Work it in order. Inspect and clean the sensor tip, reseat and check the wiring and connector, confirm the PC board ground, then measure the sensor resistance against Rinnai's numbers. If it still recurs after a good sensor and clean wiring, the board is the remaining suspect and needs a tech to confirm.
Will descaling fix Rinnai code 31?
Usually not, because 31 is an electrical sensor fault, not a scale-and-flow problem like the overheat codes. Descaling clears mineral buildup inside the heat exchanger, which matters for codes tied to overheating or restricted flow. Code 31 is about a signal from the burner sensor, so a flush does not address a corroded rod, a loose wire, or a bad board. There is one narrow exception: if the sensor tip itself is coated with scale or condensation deposits, cleaning that tip can restore the reading, and that is worth doing as part of the sensor inspection. But a full heat-exchanger descale is not the fix here. Clean and check the sensor circuit instead, and save the descale for its own maintenance schedule.