The drain valve on a water heater is a $20 plastic afterthought, and it fails in two ways that both leave you standing in a wet utility closet. It warps just enough to weep a slow drip that never quits, or it clogs so tight with sediment that the tank will not drain when you finally need it to. Either way the fix is the same: pull the plastic valve and thread in a brass ball valve that drains fast and seals for good. The whole job runs about an hour, and most of that is waiting for the tank to empty.
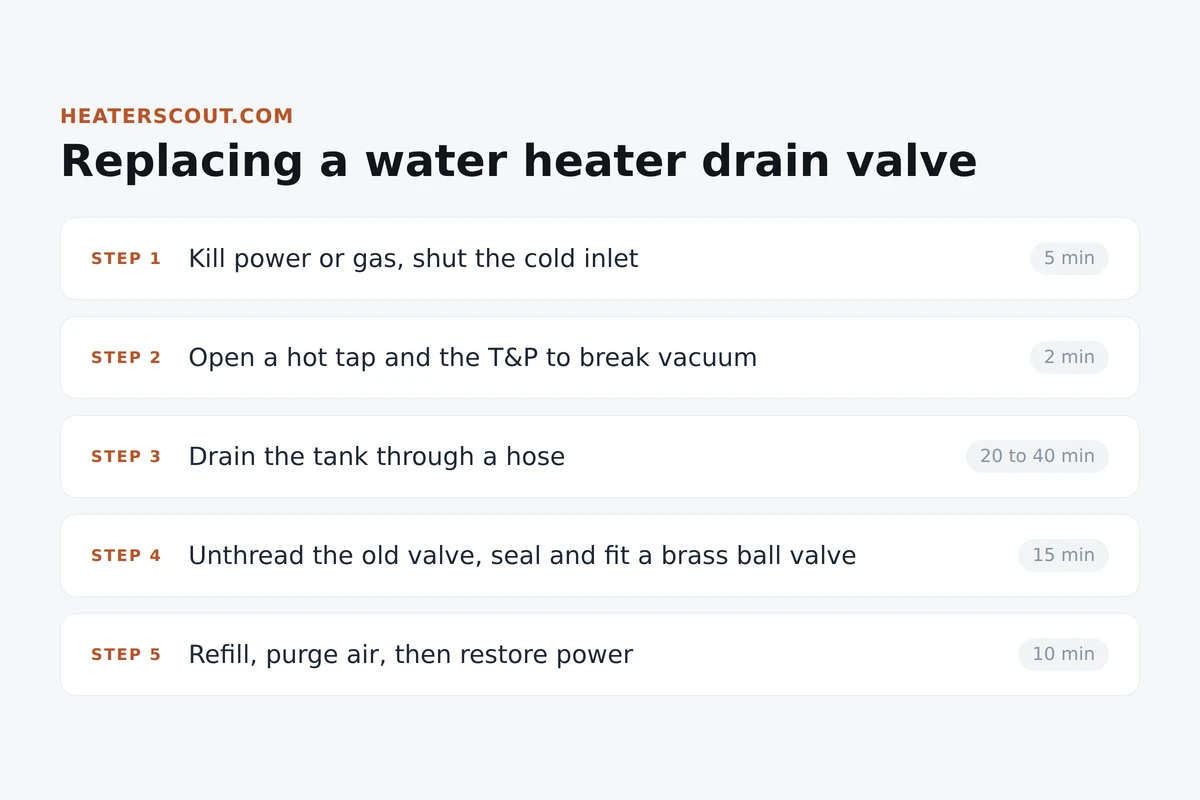
Prep the tank before you touch the valve
Do not unthread anything yet. The valve sits at the bottom of the tank with 40 or 50 gallons of hot water stacked behind it, and if you crack it loose while that water is live you are mopping the floor for an hour. The prep is four moves in order, and the one everyone skips is breaking the vacuum. Get these done and the tank empties clean while you gather your parts.
1. Kill the power or the gas
On an electric heater, flip the breaker for the water heater to Off at the panel. This is the non-negotiable step: the moment the water drops below an element and that element still has power, it dry-fires and burns out in seconds. On a gas heater, turn the round gas control dial to Pilot or Off so the burner cannot fire against a tank that is draining or empty. Confirm it is dead before you go on.
2. Shut the cold water inlet
Close the cold supply valve on the pipe going into the top of the tank. That is the handle on the inlet side, usually blue or unmarked, and it stops fresh water from refilling the tank as fast as you drain it. A lever should sit crosswise to the pipe when closed; a round wheel turns clockwise until it stops. If this valve is an old gate valve that will not fully close, you may need to shut the house main.
3. Break the vacuum
This is the step that makes the tank actually drain. With the cold inlet shut and the tank sealed, atmospheric pressure holds the water in place and almost nothing comes out. Open a hot faucet at the highest fixture in the house and lift the T&P relief valve lever on the side of the tank to let air in at the top. Air in the top means water out the bottom. Leave that hot tap open the whole time you drain.
4. Run a hose from the drain
Thread a garden hose onto the drain valve and route it to a floor drain, a laundry standpipe, or out a door to lower ground so gravity does the work. The water leaving is hot at first, so keep the end where it will not scald anyone. Open the drain valve and let it run. On a badly sedimented tank the flow may start as a trickle, which the next section deals with head-on.
If the drain crawls or quits outright, do not assume the tank is empty. A plastic valve packed with scale is the usual reason, and it is the whole point of the upgrade you are about to make. Push a stiff wire or a straightened coat hanger up through the open valve to break the sediment clog loose, and the flow usually surges back and carries a slug of gray grit with it. Keep an eye on the hose end: when the water runs clear and thin instead of hot and heavy, the tank is down to the dregs and you can move on. If the hose runs uphill to reach a drain, gravity will not empty it fully, so plan the route to run downhill from the valve.
The valve swap, step by step
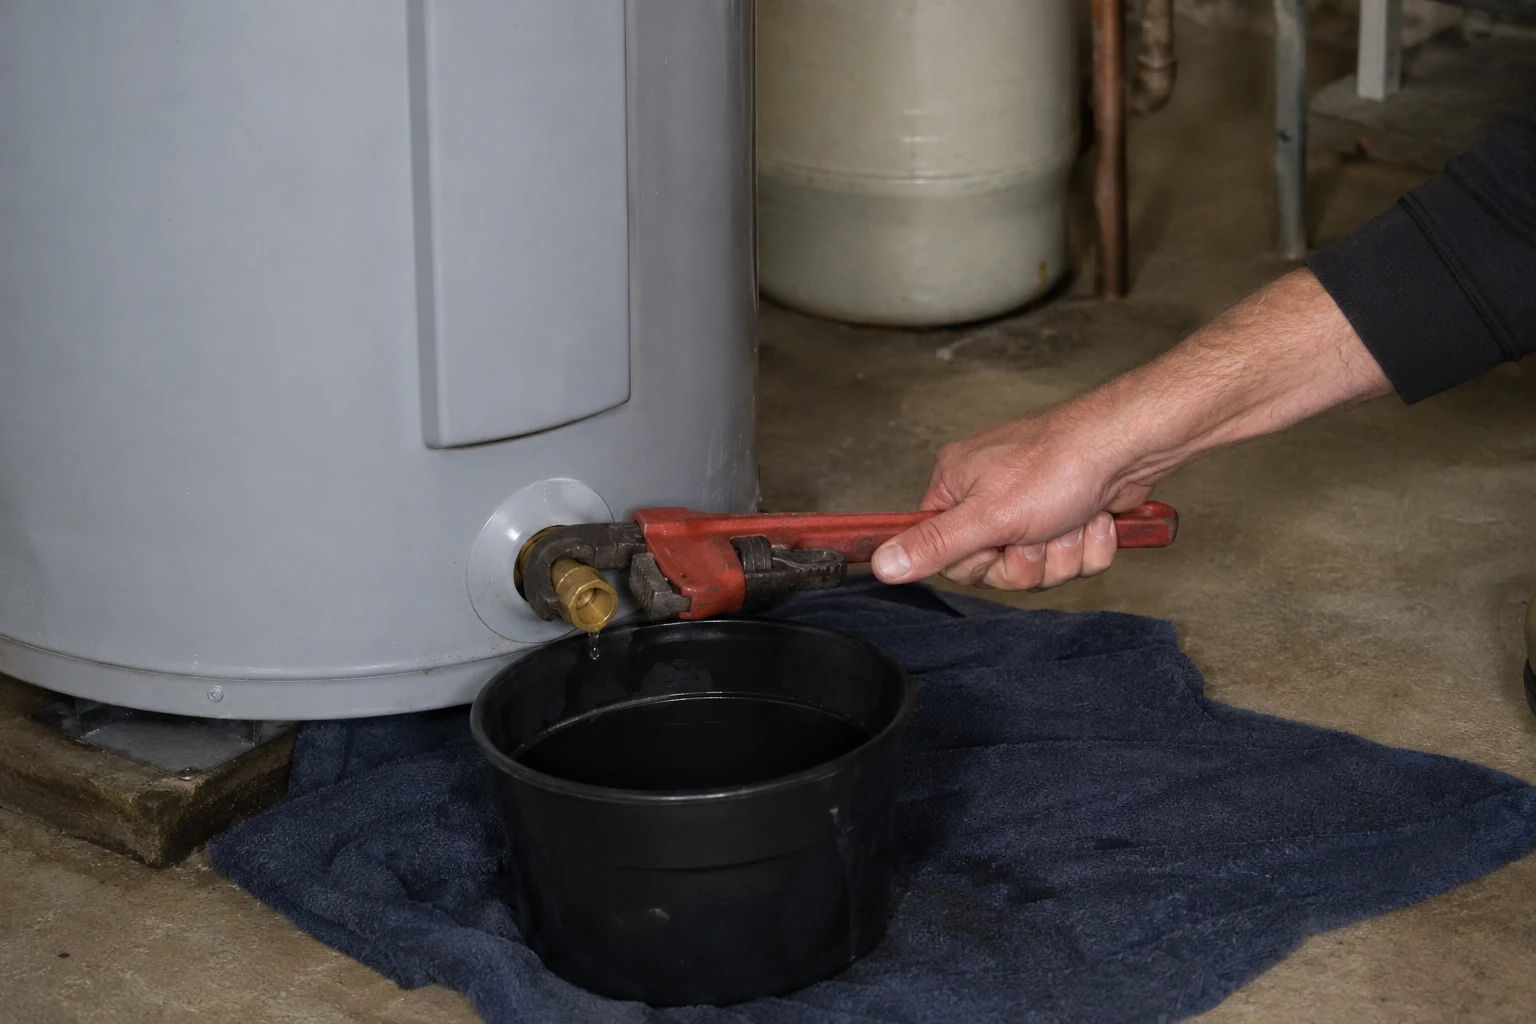
Now the tank is empty and dead, and the actual replacement is quick. The two things that trip people up are brittle old threads and getting the new valve to point the right way. Work the old valve loose gently, and dry-fit the brass valve before you seal it so you know where the lever and the hose outlet will land. Keep a bucket and rags under the fitting the whole time, because a bottom port never drains the last cupful.
What to gather before you start
None of this is exotic, but a bottom-port job goes sideways when you are halfway under the tank and realize the new valve is the wrong thread or you have no way to poke a clog loose. Lay it all out first. The valve is the one part worth spending on: buy the brass, not another plastic bibb.
- A 3/4-inch full-port brass ball valve with a male hose thread, rated for hot water. This is the whole point of the job, so do not swap plastic for plastic.
- Channel-lock pliers or a pipe wrench to back the old valve out and snug the new one in.
- PTFE (Teflon) tape or a pipe-thread sealant rated for hot potable water to seal the male threads.
- A garden hose long enough to reach a floor drain, a standpipe, or downhill to a door.
- A bucket and rags for the residual water that follows the old valve out of a bottom port.
- A stiff wire or a straightened coat hanger to poke a sediment clog loose if the tank will not drain.
- A short 3/4-inch brass nipple in case the new valve sits too shallow behind the tank jacket.
- A flashlight, because the drain port sits low and in shadow against the wall on most installs.
Never power a dry electric element
Do not restore power to an electric heater until the tank is completely refilled and the air is purged. If you energize an element that is sitting in an air pocket or above the water line, it dry-fires and burns out in seconds, turning a cheap valve swap into an element replacement. Fill with a hot faucet open, wait for the sputtering to stop and the stream to run smooth and steady, then flip the breaker. On a gas unit, the same logic applies: leave the control on Pilot or Off until the tank is full so the burner never fires against a dry or partly full tank.
| Molded plastic (OEM) | Ships on most tanks. $3 to $6. Warps under a heat gun, strips at the flats, and the tapered outlet clogs with sediment. Replace it, do not reinstall it. |
| Brass hose-bib valve | $8 to $15. Metal body takes a wrench without cracking, but the same narrow tapered outlet still passes sediment slowly. |
| Brass full-port ball valve | $15 to $25 with a 3/4 inch NPT nipple. Full 3/4 inch bore drains fast, passes chunks of scale, and seals with a quarter turn. The upgrade worth doing. |
| Thread size | Almost always 3/4 inch NPT male on the tank. Bring the old valve to the store and match the threads, not the look. |
Frequently asked
What kind of valve should I replace a water heater drain valve with?
A 3/4-inch full-port brass ball valve with a male hose thread on the outlet. The stock valve on most tanks is a molded plastic bibb with a small internal port and a screwdriver-slot stem. It seals against a plastic seat that warps with heat and clogs with the sediment it is supposed to pass. A brass ball valve has a large straight-through bore, so sediment flows out instead of jamming, and a quarter-turn lever that seats metal on a hard seat and does not weep. You want the ball valve rated for hot water, threaded 3/4-inch MIP on the tank side. Some homeowners fit a short brass nipple and a standard hose bibb instead, which drains better than plastic but not as fast as a full-port ball valve.
Do I have to drain the whole tank to change the drain valve?
Yes, drain it. The valve you are removing is at the very bottom of the tank, below the water line, so the moment it comes out you have the full head of water behind it. There is a no-drain trick where you shut the cold inlet, relieve pressure, and try to swap the valve fast while a plug or your thumb holds back the flow, but it is messy, it fails often, and a stuck old valve gives you no time. The tank drains in half an hour or so. That wait is cheaper than flooding the floor. Kill the power or gas first, shut the cold supply, break the vacuum by opening a hot tap and the T&P lever, then run a hose from the drain to a lower drain or outside.
Why does the tank drain slowly or not at all?
Two reasons, and both trace back to the cheap valve you are replacing. First, the tank holds a vacuum: with the cold inlet shut and no air let in at the top, atmospheric pressure holds the water in place, so nothing comes out until you open a hot faucet somewhere in the house or lift the T&P valve lever to break the seal. Second, sediment. Years of hard-water scale pile up on the tank floor right at the drain port and choke the small plastic opening. Poke a stiff wire or a straightened coat hanger up through the valve to break the clog loose, and the flow usually surges back. If it still crawls, the drain is packed solid and this is exactly why you are moving to a full-port brass valve.
Can I replace a plastic drain valve without shutting off the power?
Shut it off. On an electric heater this is not optional: the two heating elements screw into the side of the tank, and once the water level drops below an element and you send power to it, the element burns out in seconds. That is called dry-firing, and it turns a $20 valve job into an element replacement. Flip the breaker for the water heater off before you drain anything, and do not turn it back on until the tank is completely refilled and you have purged the air out of the lines. On a gas heater, turn the gas control to Pilot or Off so the burner does not fire against a draining or empty tank.
The new brass valve threads look different from the old plastic one. Will it fit?
Almost always, yes. Residential tanks use a standard 3/4-inch NPT female drain port, and both the plastic OEM valve and a 3/4-inch MIP brass ball valve thread into it. The difference you are seeing is the material and the port size, not the thread. Wrap the male threads with three or four turns of PTFE tape or use a pipe-thread sealant rated for hot water, then thread the brass valve in hand-tight and snug it another turn or two with a wrench until the outlet points where you want it. Do not overtighten into the tank fitting. If the old valve left a shorter stub than the new valve needs, add a short 3/4-inch brass nipple so the new valve clears the tank jacket.
What does it mean to purge air before turning the heater back on?
When you refill an empty tank, air gets trapped at the top and in the hot lines. If you power an electric heater with an air pocket sitting around an element, that element can dry-fire even though the tank looks full. To purge, open the cold inlet and let the tank fill with a hot faucet open somewhere in the house. Water sputters and spits at first as air blows out, then runs in a smooth, steady stream with no coughing. That steady stream is your signal the tank is full and the lines are clear. Only then do you restore power or turn the gas control back to On.