A 40-gallon water heater with the safety valve stuck shut can build enough pressure to punch through a floor, a ceiling, and a roof. That is the reason every residential tank carries a T&P valve, and why the one part of this appliance you never plug, cap, or bypass is that little brass valve on top. Replacing one is a short job on an accessible tank. What trips people up is matching the valve to the tank, running the discharge in a material and geometry the code accepts, and figuring out whether the old valve was worn out or was faithfully venting a pressure problem the whole house still has.
Read this before you touch anything
Never cap or plug a leaking T&P valve, and never install a shutoff on the discharge line. Both defeat the only safety device standing between a sealed pressure vessel and a rupture. Before you touch the fitting, cut power at the breaker on an electric heater or set the gas control to OFF or PILOT on a gas unit, close the cold-water supply above the tank, and open a hot tap on the floor above to relieve pressure. A hot pressurized tank does not forgive shortcuts.
The short version
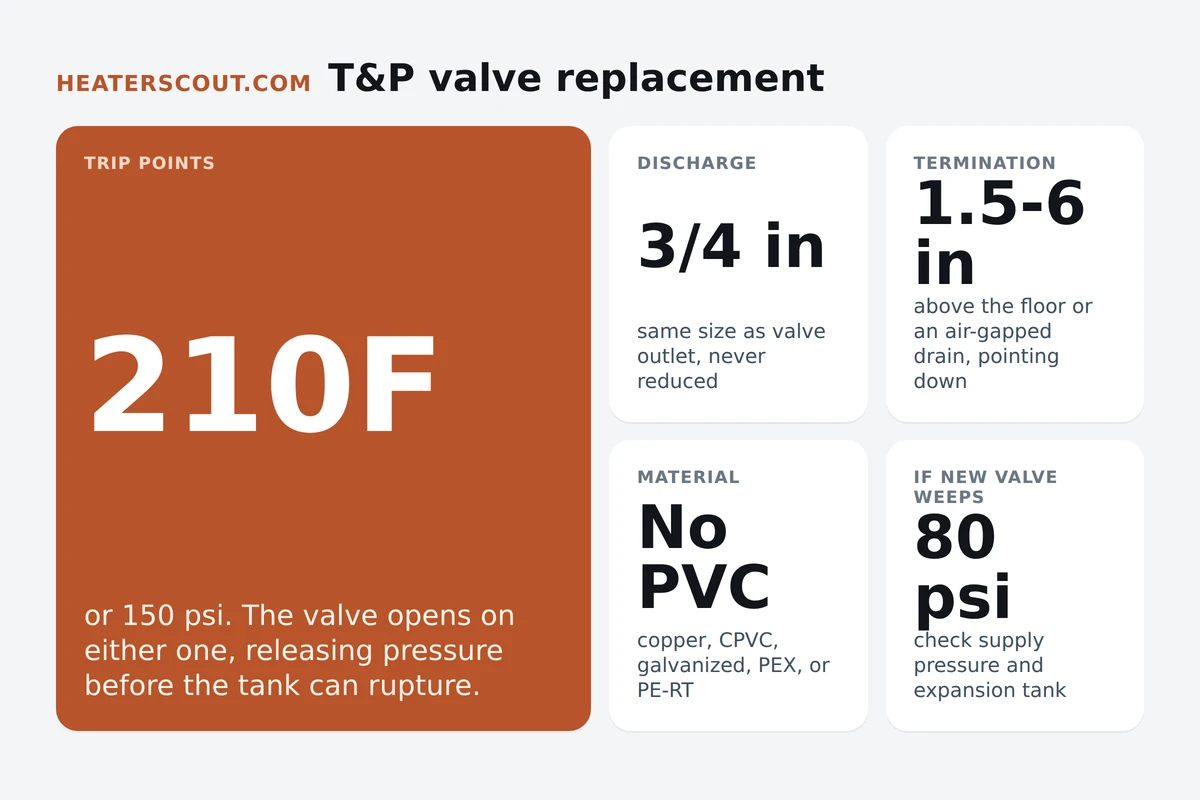
Match a 150 psi / 210 F valve with 3/4 in NPT thread and a BTU rating equal to or above the heater input. Shut off power or gas, close the cold supply, open a hot tap above, drain a few gallons until the water level is below the T&P port, unscrew the old valve, wrap the new one with Teflon tape, and snug it in with the outlet aimed the right way. Reinstall a 3/4 in copper, CPVC, galvanized, PEX, or PE-RT discharge that runs downhill only, terminates between about 1.5 inches and 6 inches above the floor pointing down, and finishes as an open cut with no threads, no cap, no valve. Never PVC. If the reason you are here is a valve that keeps discharging, check house pressure and the expansion tank before you spend a dollar on a new valve.
What is the difference between a T&P valve, a TPR valve, and a relief valve?
Three names for the same part. T&P stands for temperature and pressure. TPR spells out temperature and pressure relief. If the valve reads 150 psi and 210 F and threads into the port on top of a water heater, it is the valve you want. Boiler and hydronic-loop relief valves are different parts on different ratings, so make sure the box says water heater and lists both a pressure and a temperature trip point.
Temperature and pressure relief (T&P) valve
A spring-loaded brass safety valve required by code on every residential storage water heater. It threads into a dedicated port on the top or upper side of the tank and combines two independent sensors: a temperature probe extending into the hot water and a pressure element inside the body. The valve opens automatically and dumps hot water through a discharge pipe when the water reaches about 210 F or the internal pressure reaches about 150 psi, whichever happens first. The valve has a manual test lever and is rated for a maximum BTU discharge capacity that must equal or exceed the input rating of the heater it protects.
Match the valve to the tank
Three numbers off the old valve and the tank's rating plate tell you what to buy. The pressure and temperature ratings (150 psi and 210 F on every US residential heater). The thread size (3/4 inch NPT on essentially every consumer tank). And the BTU discharge rating stamped on the valve, which must equal or exceed the input rating on the heater's data plate. A 40,000 BTU gas heater needs a valve rated for at least 40,000 BTU. Undersize it and it cannot relieve fast enough to keep up with a runaway burner.
The detail nobody mentions at the counter is probe length. The temperature probe extends into the tank and needs to sit in water, not in insulation or the airspace at the top. Bring the old valve to the store and buy one with the same probe geometry. A probe that is too short reads cool and never trips on temperature no matter how hot the water gets.
The shutdown, in order
The valve swap is straightforward. The shutdown before it is where safety lives. Do these in order.
Cut the heat source. Electric: flip the two-pole breaker to OFF. Gas: rotate the gas control valve to OFF or PILOT. If the burner or elements are running when you drop the water level, they can dry-fire and destroy themselves in under a minute.
Close the cold-water supply. Shutoff on the cold inlet at the top of the tank, clockwise until it stops. If it is frozen or missing, close the main house valve.
Relieve pressure. Open a hot-side faucet on the floor above, or the highest hot tap you have. This lets air in so the tank can drain and bleeds off system pressure.
Drop the water level. Garden hose on the drain valve, run to a drain or outside, let two to five gallons out, enough to bring the water level below the T&P port.
Removing and installing the valve
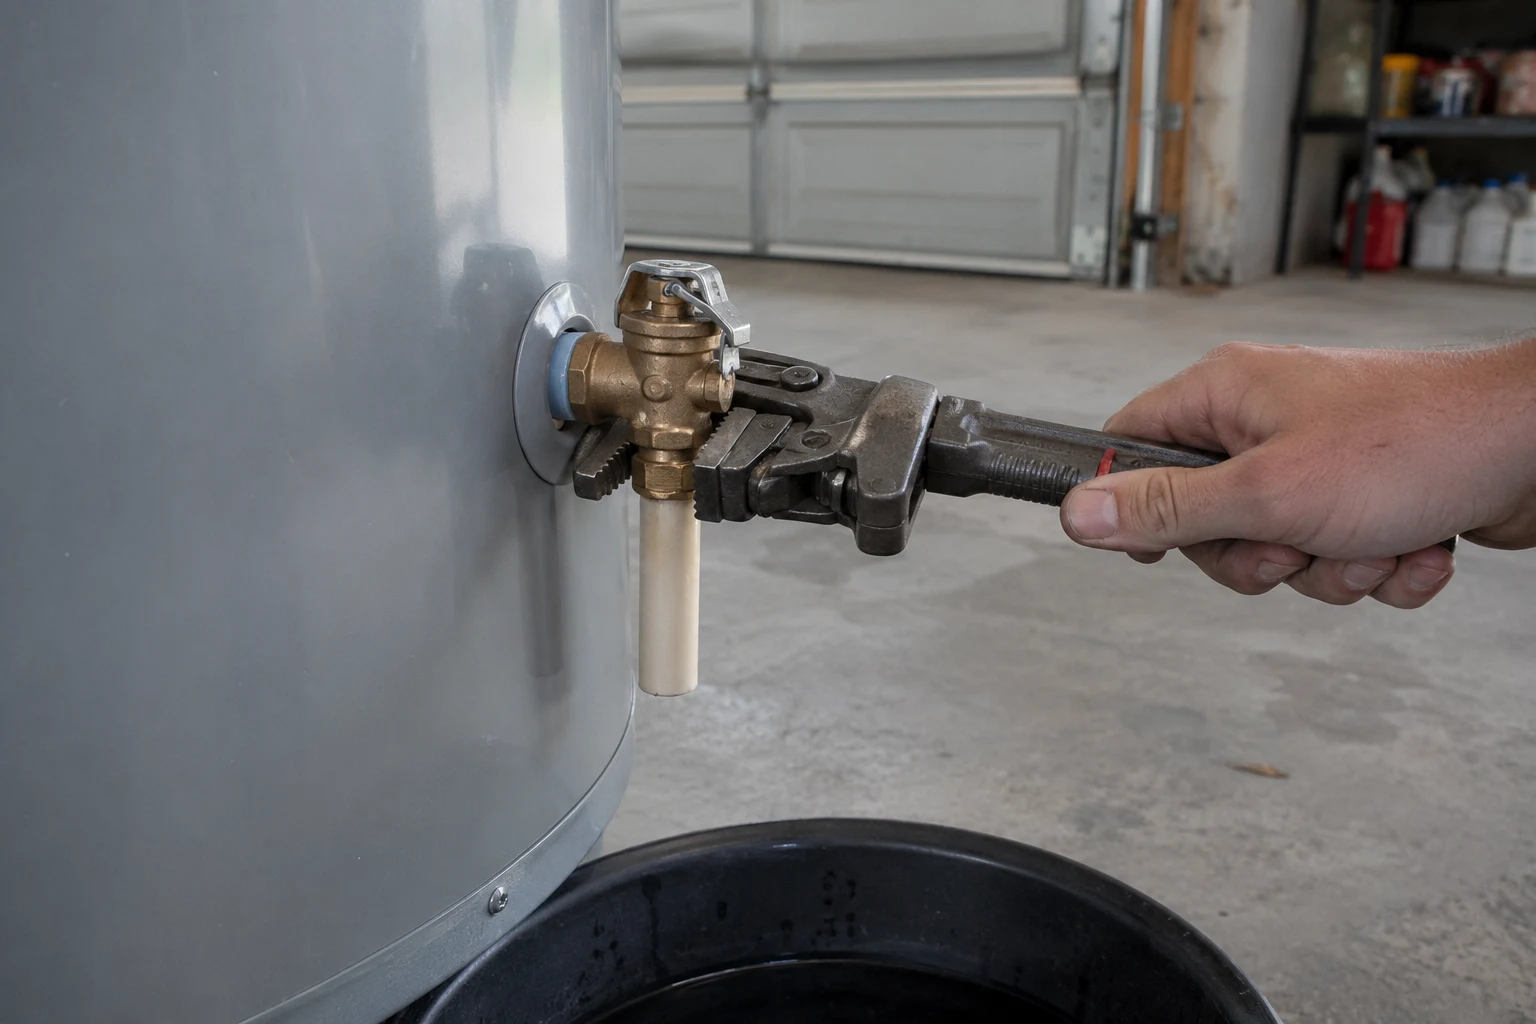
Put a bucket under the valve. Disconnect the existing discharge pipe: unscrew if threaded, cut back to a coupling if glued or soldered. Put a pipe wrench on the hex flats of the valve body and turn counterclockwise. Old valves need real force on the first quarter turn, then break free. If the valve refuses to move, penetrating oil at the base of the threads and a ten-minute wait usually helps. Do not lever off the tank shell.
Expect a pint or two of hot water to follow the valve out. Wipe the tank threads clean and inspect. Stripped, cross-threaded, or corroded threads mean the tank itself is at the end of its life. If the threads look intact, wrap the male threads on the new valve with two to three turns of PTFE tape (clockwise, so it does not unwind), or use potable-water pipe dope. Do not use both.
Thread the new valve in by hand first so it starts straight. Once finger-tight, snug it down with the wrench, aiming the outlet where the discharge pipe will run. Do not over-torque past that position.
The discharge pipe: where most installs fail inspection
A working T&P valve wired to a bad discharge pipe is not much safer than a broken valve. Every code agrees on the basics, and every rule exists because someone got hurt when it was ignored.
The pipe must be the same nominal diameter as the valve outlet (3/4 inch on every standard residential valve) and never reduced. It must be rated for hot water and low-pressure steam. Current code approves copper, CPVC, galvanized steel, PEX, and PE-RT. If you run PEX, size it one nominal size larger than the valve outlet and secure it so it cannot whip when it discharges. White PVC is not allowed anywhere in the country because it softens well below 210 F and can collapse its own bore when hot water runs through it. CPVC is fine; PVC is prohibited.
Slope downhill by gravity for the entire run. No upward loops. No traps. No valves. Terminate between about 1.5 inches (roughly twice the pipe diameter) and 6 inches above the floor or an approved drain, pointing down, plain open cut. No threads on the end, because threads invite someone to cap it. At a floor drain or laundry sink, terminate above the flood rim with an air gap, not submerged.
Refill and the first test
Close the drain and remove the hose. Open the cold-water supply, leave the upstairs hot tap open, and when water runs steady with no sputter of air the tank is full. Check the new valve for weeps at both the tank threads and the outlet. Wait five minutes, check again, then restore power or gas.
Once the tank is up to temperature, test the valve. Stand to the side of the discharge termination. Lift the manual lever partway for one to two seconds. Hot water should shoot out, and when you release the lever it should snap back and the drip should stop within a minute. If nothing comes out, the new valve is defective and needs to be replaced on the spot.
When the new valve starts weeping in a week
Plumbers get this call a few times a month. In almost every case the valve is not defective. Two root causes account for the overwhelming majority.
First is high supply pressure. Code allows up to 80 psi in the house. Above that, the T&P sees spikes past 150 psi during heating cycles. Diagnose with a $10 gauge on a hose bib. If static pressure reads over 80 psi, install a pressure-reducing valve at the service entry. If a PRV is already there and reads high, the PRV has failed.
Second, more common in newer houses, is thermal expansion on a closed system. If the plumbing has any check valve, backflow preventer, or PRV between the water heater and the main, the system is closed. Water that expands as the tank heats has nowhere to go, so pressure spikes 50 to 100 psi every cycle and the T&P vents it. Fix: a thermal expansion tank on the cold-water inlet, pre-charged to house static pressure. Without one, no T&P stays dry on a closed system.
Tools and parts you actually need
Keep the list short. If you show up with these you can do the job.
- Replacement T&P valve, 150 psi / 210 F, 3/4 in NPT, BTU rating equal to or above the heater input
- Matching probe length (bring the old valve to the store)
- 3/4 in copper, CPVC, galvanized, PEX, or PE-RT pipe for the discharge (or reuse if intact); size PEX one nominal size larger
- PTFE (Teflon) tape rated for potable water, or potable-water pipe dope (not both)
- Pipe wrench or large channel-lock pliers
- Garden hose and bucket for the drain
- Safety glasses
- Pressure gauge that threads onto a hose bib (for the weeping-valve diagnosis)
- Thermal expansion tank on hand if the house has a PRV or a backflow preventer
Discharge pipe rules at a glance
Check every one on the finished install. If any line is wrong, redo it.
| Diameter | Same as the valve outlet, typically 3/4 in, never reduced anywhere. Size PEX one nominal size larger |
| Material | Copper, CPVC, galvanized steel, PEX, or PE-RT. CPVC is OK; PVC is prohibited |
| Direction | Downhill by gravity, entire run, no upward loops or traps |
| Termination height | Between about 1.5 inches (twice the pipe diameter) and 6 inches above the floor or an approved drain, pointing down |
| End fitting | Plain open cut. No threads, no cap, no valve, no reducer |
| Air gap | Required at a drain or receptor: pipe end above the flood rim, never submerged |
| Length limit | Per manufacturer instructions, generally not to exceed about 30 feet developed |
| Never | Do not cap, plug, valve, reduce, or route uphill |
Match the valve, do the shutdown in order, run the discharge downhill and open near the floor, and figure out whether the old valve was worn out or doing its job. Get that right and the new valve stays quiet for years.
Frequently asked
What is a T&P valve and why is it required?
The temperature and pressure relief valve, also called a TPR or T&P, is the last-line safety on every residential tank water heater. It sits on the top or upper side of the tank with a discharge pipe running toward the floor. If the water climbs past about 210 F or pressure passes 150 psi, the valve opens and dumps hot water. Codes require one because a sealed tank without a working relief can rupture violently.
When does a T&P valve need to be replaced?
Five situations: it drips continuously; it will not reseat after a lever test; the lever produces no discharge at all (stuck shut, the most dangerous failure); the body is corroded or crusted with scale; or the printed date on the valve is past service life. Do not treat repeat discharges as an automatic reason to swap. A valve that keeps opening is usually responding to a real pressure spike upstream.
Can I just plug a leaking T&P valve until I get to it?
No. A cap, plug, or shutoff on the discharge defeats the entire safety device. If the valve is worn, plugging it hides a bad valve on a live pressure vessel. If pressure is actually climbing, plugging it lets the tank build past the limit with nothing to vent. Both cases end the same way: a superheated rupture. Diagnose why it leaks and replace it. Never install a valve on the discharge line.
What material can the discharge pipe be, and how does it terminate?
Current code approves copper, CPVC, galvanized steel, PEX, and PE-RT. If you use PEX, size it one nominal size larger than the valve outlet and secure it. White PVC is prohibited because it softens well below 210 F. Run the pipe the same nominal diameter as the valve outlet (3/4 inch on residential heaters) and never reduce it. Route downhill by gravity, no upward loops, no valves. Terminate between about 1.5 inches (roughly twice the pipe diameter) and 6 inches above the floor or an approved drain, pointing down, plain open cut with no threads and no cap.
Why does my brand-new T&P valve start dripping within days?
You replaced a symptom, not a cause. Two culprits: high supply pressure over 80 psi from the street (diagnose with a $10 hose-bib gauge, fix with a pressure-reducing valve at the service entry), or thermal expansion on a closed system with a check valve, backflow preventer, or PRV between the tank and the main. Fix expansion with a properly sized thermal expansion tank on the cold inlet, pre-charged to match house pressure. Without one, no new T&P stays dry on a closed system.
What tools and parts do I need?
A replacement T&P rated 150 psi and 210 F with 3/4 inch NPT thread and a BTU relief capacity equal to or above your heater's input. A length of 3/4 inch CPVC, copper, or galvanized pipe for the discharge (or reuse if intact). PTFE tape rated for potable water, or potable-water pipe dope. A pipe wrench or large channel-lock. A bucket. Safety glasses. A hose-bib pressure gauge if you are diagnosing repeat weeps.
Can I do this myself or do I need a plumber?
Most confident DIYers finish this in under an hour on an accessible tank. Call a plumber if the port is in a tight closet, the old valve is fused into the tank thread, the discharge run needs re-routing to meet code, or the reason you are here is repeat discharges (fixing the pressure or expansion problem is the real repair). Stripped or corroded tank threads mean the tank itself is at end of life.
Is it safe to test the T&P valve by lifting the lever?
Yes. Manufacturers recommend testing it at least once a year. Stand to the side of the discharge termination, not over it, because scalding water and a bit of steam come out. Lift the lever partway for one to two seconds, then let it snap back. A healthy valve stops dripping within a minute. If nothing comes out or it will not reseat, swap the valve the same day.