A dip tube is a 30 to 48 inch length of plastic pipe, and when it cracks you lose more than half your usable hot water inside a week. It threads into the cold inlet at the top of the tank and hangs almost to the bottom, routing cold water down so the hottest water can stack at the top for the outlet. Break the tube and cold dumps in beside the hot outlet, mixing into the line to the house. Showers go tepid, aerators fill with white plastic chips, and a 50-gallon tank acts like a 20. The fix is a $10 PEX tube, a wrench, and about an hour at the top of the tank.
White chips packed into every aerator
Your tank was built between 1993 and 1997, the water went lukewarm, and every faucet aerator you pull is packed with brittle white or grey plastic bits. That is the polypropylene tube from that era coming apart. Swap the tube in PEX, then clean every screen in the house.
Hot runs out in 5 minutes instead of 15
Nobody moved the thermostat, the burner or elements still fire, but a shower that used to stay hot for a full 15 minutes now goes cool in under 5. A shortened or cracked tube is letting cold water short-circuit to the outlet from the first draw, so delivered temperature crashes.
You started on the hot outlet
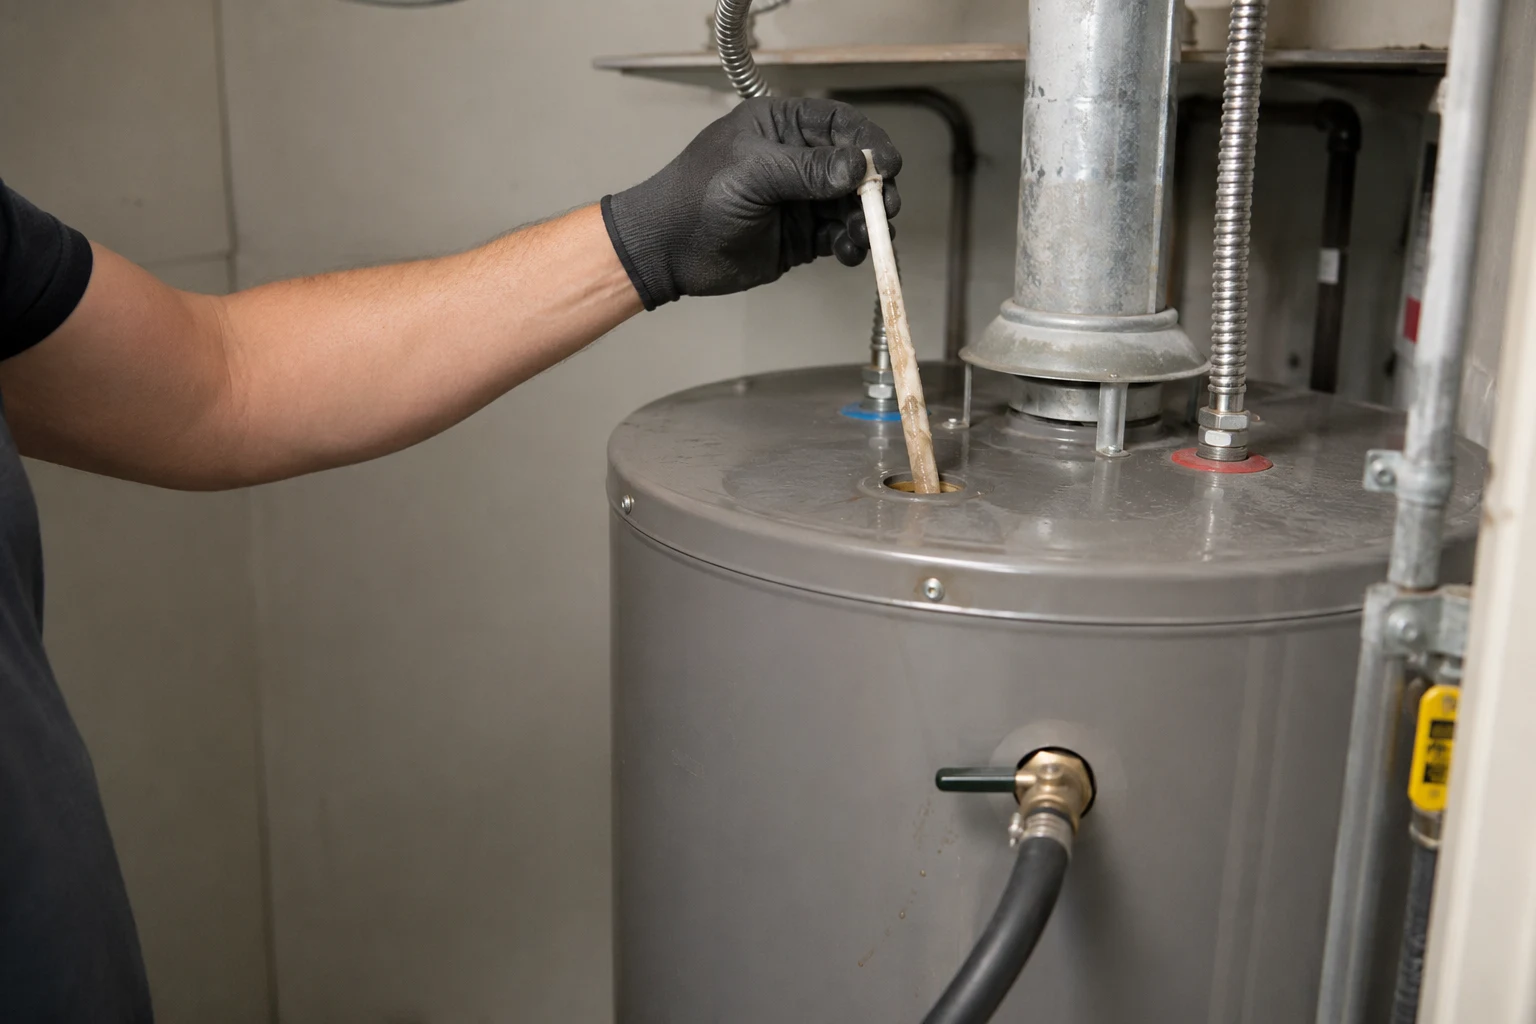
You read there is a tube inside and began unthreading the hot outlet to find it. Stop and move to the cold side. The dip tube lives on the cold inlet only, marked blue on most tanks, and the hot outlet is a plain opening with nothing to pull out.
The dip tube always sits in the cold inlet, never the hot outlet. If you are unthreading the red-marked port, you are on the wrong side of the tank.The rule that saves this repair
What the dip tube does and why it kills your hot water when it breaks
Water heats from the bottom of the tank, whether the source is a gas burner underneath or a pair of electric elements in the side wall. Hot rises, cold sinks, and the tank naturally stratifies with the hottest water in the top third and cooler water below. The hot outlet pulls off that top layer, which is why a working tank delivers near-setpoint water for most of its rated capacity. Incoming cold water, though, would dump straight in at the top and pour out the outlet cold before it ever warmed. That is the problem the dip tube solves: it threads into the cold-inlet nipple and hangs almost to the tank floor, so cold water enters low, below the hot layer, where it heats and rises in turn.
When the tube cracks near the top, breaks off partway down, or shortens with age, cold water no longer reaches the bottom. It enters high and mixes with the hot layer just under the outlet, so every draw pulls a blend of stored hot and fresh cold instead of pure hot. Delivered temperature drops from the first minute and usable capacity crashes. A 50-gallon tank behaves like a 20, with the burner or elements still cycling normally. The mid-90s failure adds a second symptom: the polypropylene tubes of that era disintegrated into flakes that traveled through the hot water and lodged in every screen downstream, so lukewarm water arrives alongside mystery clogs in aerators, shower heads, and washer inlet filters all at once.
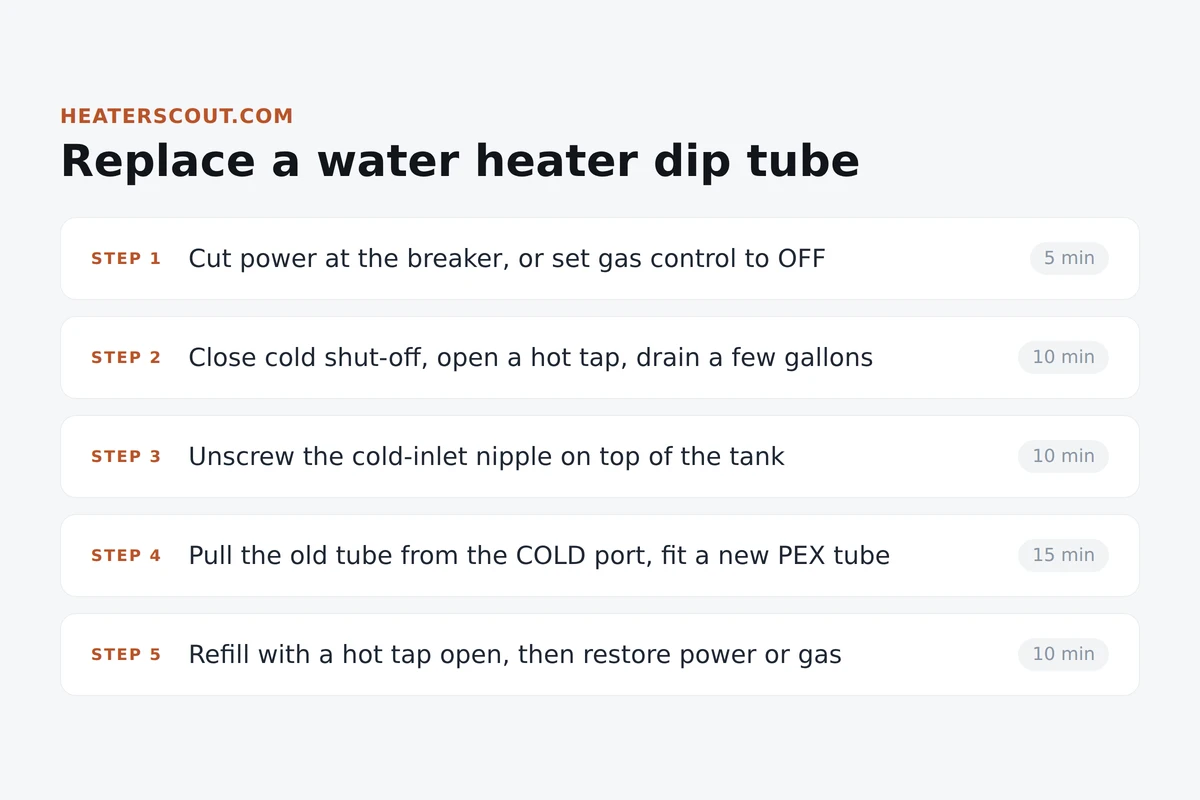
Replacing the dip tube, step by step
This is one of the friendlier plumbing repairs on a storage tank because the work happens entirely at the top. You barely drain anything, the fittings are accessible, and the replacement tube is a $10 part at any plumbing supply house. Keep the cold and hot ports straight, do not restore power to an electric element while the tank sits partly filled, and have a bucket ready under the cold inlet when you break the union.
Never power a dry electric element
Do not restore power to an electric heater until the tank is completely full and every air pocket is purged with a hot tap running smooth and steady. Energizing an element that sits above the water line or in trapped air dry-fires it and burns the sheath in seconds, turning a $10 dip-tube repair into an element replacement plus a second drain. On a gas unit, hold the same rule: leave the gas control at Off until the tank is full so the burner cannot fire against a partly filled tank. Full first, power second.
Dip tube
The plastic pipe that threads into the cold-water inlet at the top of a storage water heater and hangs almost to the tank floor. It routes incoming cold water down to the bottom so it heats and rises, keeping the hottest water layered at the top where the hot outlet draws. Modern dip tubes are cross-linked PEX rated for hot potable water and last the tank life. A 1993 to 1997 batch used a polypropylene formula that broke down into white plastic flakes, and those are the tubes that gave the part its bad reputation. The dip tube sits in the cold inlet only, never the hot outlet.
| Which port | Cold inlet on top of the tank, always. Marked blue; the line feeding fresh water in. The hot outlet has no dip tube. |
| Replacement material | Cross-linked PEX rated for hot potable water, 30 to 48 in. The 1993-1997 polypropylene tubes are the ones that crumbled. |
| Tube length | About 30 in for 30-gallon tanks, 34 to 40 in for 40-gallon, and 40 to 48 in for 50-gallon and taller. End should sit 1 in above the tank floor. |
| How much to drain | Only 2 to 3 gallons off the bottom, enough to drop the level below the cold inlet. This is a top-of-tank job. |
| Tools | Adjustable or pipe wrench, channel-lock pliers, PTFE tape, flashlight, bucket and rags. Add a fresh nipple if the old one is corroded. |
| Main symptoms | Lukewarm water, hot supply that runs out fast, and white or grey plastic bits packed into aerator and shower head screens. |
| Power rule | Cut electric power or set gas to Off before draining. Restore only after the tank is full and the lines are purged. |
| Time on the job | 45 to 75 minutes of hands-on work, plus a full heat cycle of 60 to 120 minutes to verify at the tap. |
Frequently asked
How do I know the dip tube is what failed?
Two signals point at the tube. First, the water goes lukewarm even with the thermostat cranked up, and the hot supply runs out in a fraction of the usual time, so a 15-minute shower that used to stay hot now goes cool inside 5. That happens because a cracked or shortened dip tube dumps incoming cold water in at the top of the tank next to the hot outlet, and every draw is a blend of stored hot and fresh cold. Second, unscrew a faucet aerator and look at the screen. Small white or grey plastic chips packed against the mesh are the tube itself crumbling apart.
Which tanks came with defective dip tubes?
Roughly the 1993 to 1997 build window across several major residential brands. A polypropylene formula used for dip tubes in that era could not handle sustained storage temperatures and broke down into flakes rather than staying intact. If your heater's rating label shows a build date inside that range and you are getting lukewarm water plus plastic bits at the aerators, the original tube is almost certainly the cause. Modern replacements use cross-linked PEX and last the useful life of the tank.
Do I have to drain the whole tank to swap the dip tube?
No. The tube threads into the top of the tank, so you only need to drop the water level a couple of gallons below the cold inlet, enough that unscrewing the nipple does not release a column of water. Close the cold shut-off, open a hot tap upstairs to relieve pressure, then open the tank drain and let roughly 2 to 3 gallons out before closing it again. Keep a bucket under the cold inlet, because the short run of pipe above the tank still holds water.
Is the dip tube on the hot or cold port?
Always the cold inlet. The tube carries incoming cold water down to the bottom of the tank so it heats and rises, keeping the hottest water at the top where the outlet pulls from. The hot outlet has no tube inside; it is a plain opening at the top of the tank. Most tanks mark the cold inlet blue and the hot outlet red, and the cold line is the one feeding fresh water in. If you start on the hot side, you are on the wrong port.
What length dip tube do I buy?
Match the tube to your tank height. Most residential tanks take a tube in the 30 to 48 inch range: around 30 in for 30-gallon tanks, 34 to 40 in for 40-gallon, and 40 to 48 in for 50-gallon and taller. Pull the old tube first, measure it, and buy the same length in cross-linked PEX, or buy a long universal tube and cut it down with a fine-tooth saw so the bottom sits about an inch above the tank floor. Confirm the tube is rated for hot potable water before it goes in.
What tools do I need for the job?
An adjustable or pipe wrench for the cold-inlet nipple, channel-lock pliers to pull the old tube, a flashlight to see into the port, PTFE thread-seal tape for the nipple threads, and a bucket with rags. The consumable is the new PEX dip tube itself, and it is worth having a fresh brass or dielectric nipple on hand in case the old one is corroded; reusing a pitted nipple invites a slow leak.
Do I need to clean the aerators and shower heads afterward?
Yes, and skipping this step is why some owners think the repair did not work. When the old tube crumbled, flakes rode the hot water into every fixture in the house and lodged in the aerator screens, shower head outlets, washer inlet filters, and dishwasher screens. Replacing the tube stops new debris at the source, but the flakes already trapped downstream stay there until you remove them. Unscrew each aerator, rinse the screen clean, and pull the small mesh washers on the washing machine hoses.