Scale is the quiet killer of a tankless water heater. Every gallon of hard water that runs through the heat exchanger leaves a thin film of calcium and lime on the inside of the coil, and that film does two bad things at once. It insulates the burner or elements from the water, so the unit fires harder and longer to hit the same temperature, and it narrows the passages until flow drops and the control board starts throwing maintenance and scale codes. Flushing, also called descaling, is how you scrub that film back out. It is an hour of work with a pump and a bucket, and on hard water it is the single most important thing standing between you and a five-figure heat exchanger failure.
A tankless heater has no tank to drain. The whole maintenance job is circulating a mild acid through the coil to dissolve the scale that a tank heater never even collects the same way.The core difference from a tank heater
With isolation valves: the normal flush
- Shut the unit down. Gas tankless: turn the gas supply off. Electric: kill the breaker or unplug.
- Close both isolation (service) valves so house water is cut off from the unit.
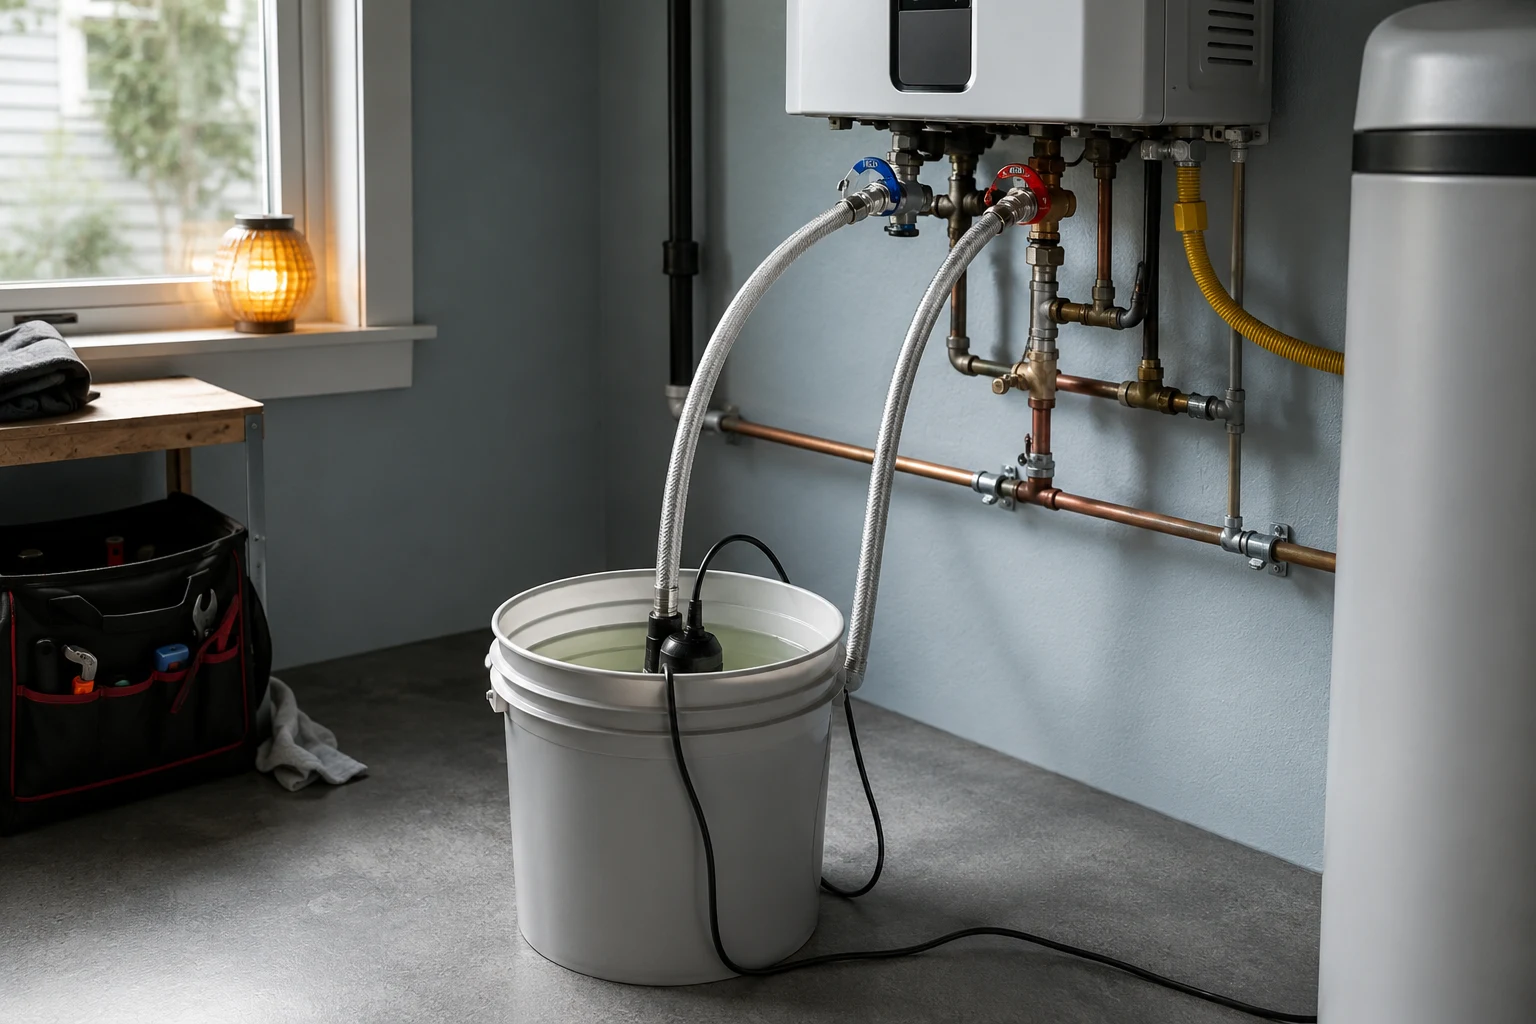
- Thread a hose onto the cold service-valve drain port and drop it into a 5-gallon bucket with the pump. Run a second hose from the hot service-valve drain port back into the same bucket.
- Pour in about 4 gallons of undiluted white vinegar or an approved descaler. Open both service-port valves.
- Plug in the pump and circulate 45 to 60 minutes. On heavy scale, swap in fresh vinegar at the halfway mark and run again.
- Stop the pump, drain the used solution, disconnect the pump. Open the isolation valves and run clean house water through for 5 to 10 minutes until it runs clear.
- Pull and clean the cold inlet filter screen, reopen the valves, check for leaks, then restore gas or power and restart.
No isolation valves: stop and add them
- If the unit has no service valves, there is nowhere to connect the pump and no way to isolate it. Do not improvise a flush around it.
- Some brands, including Rheem, require isolation valves to flush at all.
- Have a plumber install a tankless service valve kit: matched color-coded hot and cold valves with drain ports, sized to your unit.
- It is a one-time cost that makes every future flush a job you can do yourself in about an hour.
- Small point-of-use electric units sometimes have no valves by design and instead need the heating elements removed to descale. Check your manual before buying anything.
- The union-disconnect method to flush without valves exists, but it is wet, fiddly, and best left to a pro.
Why scale on the heat exchanger actually matters
The heat exchanger is a coil of metal tubing that the burner flame or the electric elements heat while water races through it. It only works because the metal is thin and the water contact is close. Scale ruins both. A layer of calcium as thin as a business card acts like a blanket over the burner, so the unit runs longer and hotter to make the same hot water, which drives your gas or electric bill up and cooks the coil toward early failure. At the same time the deposit narrows the water passages, so flow drops off and the temperature gets unstable. That is when the control board starts flagging it. Most modern tankless units watch for the symptoms of scale and throw a maintenance or scale-related code long before the coil dies, which is the display begging you to flush it.
Descaling (flushing) a tankless heater
Circulating a mild acid, undiluted white vinegar or an approved commercial descaler, through the heat exchanger with a small submersible pump for roughly 45 to 60 minutes to dissolve the mineral scale bonded to the inside of the coil. It is the tankless equivalent of a tank heater's sediment drain, but because a tankless holds no standing water, you cannot drain the deposit out. You have to dissolve it in place and then flush the residue clear with fresh water.
Quick answer
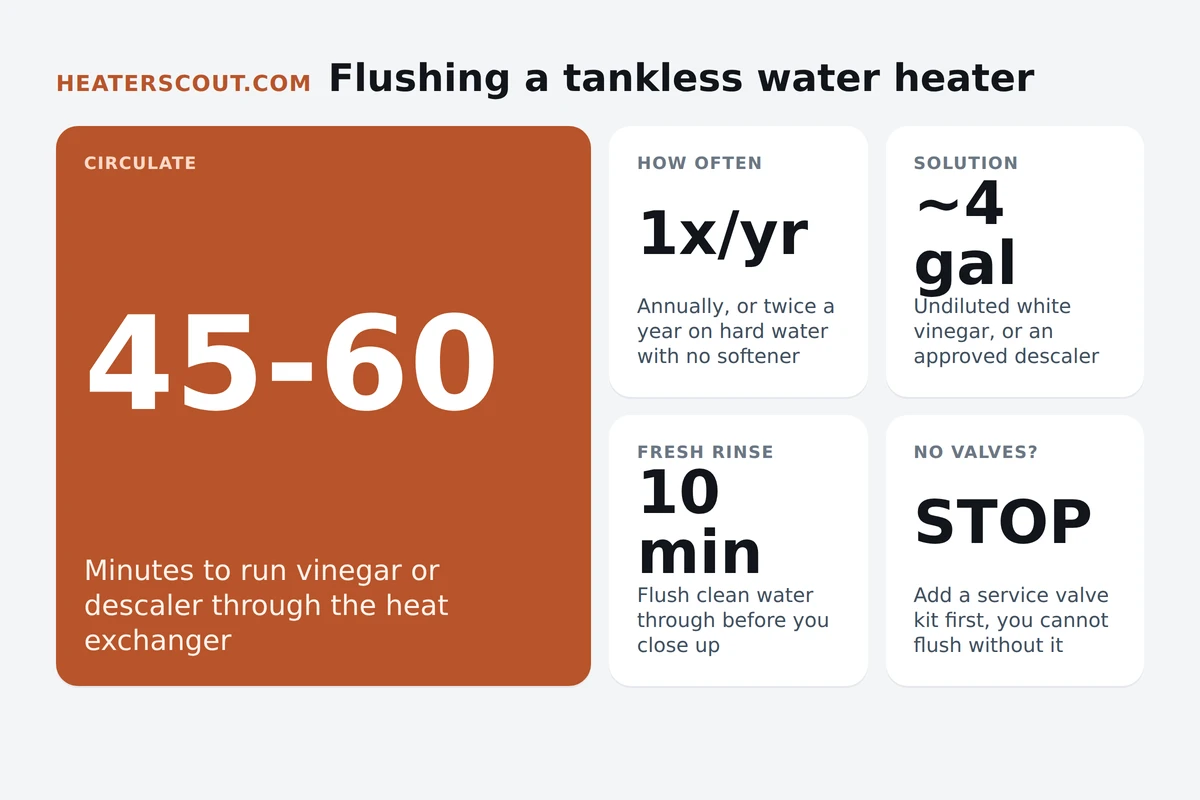
To flush a tankless water heater, shut the unit down (gas off on a gas unit, breaker off on an electric one), close both isolation valves, and hook a submersible pump and two hoses to the service-valve drain ports with about 4 gallons of undiluted white vinegar or an approved descaler in a 5-gallon bucket. Circulate 45 to 60 minutes, then flush clean water through for 5 to 10 minutes and clean the cold inlet filter screen. Do this at least once a year, twice on hard water. If the unit has no isolation valves, you cannot flush it until a plumber installs a service valve kit.
The solution: vinegar or a commercial descaler
This is the one choice worth getting right, because the makers do not all agree. Rinnai is the clearest: about four gallons of plain, undiluted white vinegar, and never a chemical cleaner, since the same heat exchanger carries your drinking water. Navien approves either white vinegar or an approved descaling solution. Noritz accepts pure vinegar or a CLR-type product. But several other brands do not universally endorse vinegar, and a few warn that acid can nibble at certain seals or simply will not touch heavy scale, so the rule that beats any blog is to read your own manual first. In practice, white vinegar is cheap, safe to handle, and plenty for light to moderate buildup on a unit flushed every year. A commercial descaler works faster and dissolves heavier hard-water scale that vinegar struggles with, at the cost of being a real chemical you have to rinse out thoroughly.
White vinegar, one pass
About 4 gallons of undiluted white vinegar circulated 45 to 60 minutes, then a 10-minute fresh rinse. Cheapest and safest, and enough when you stay on schedule and the water is not brutal.
Commercial descaler, or two vinegar passes
Heavy scale needs more bite. Use an approved descaler for a faster, deeper clean, or run vinegar, dump it at 30 minutes, refill, and run again. Rinse longer since the deposit was thicker.
Gas off, then circulate
Turn the gas supply off before anything else. The descaling loop is otherwise identical to electric: pump, bucket, two hoses on the service valves, circulate, rinse, clean the screen.
Power off, check for valves
Kill the breaker or unplug it first. Many small point-of-use electric units have no service valves and need the elements pulled to descale, so confirm yours has ports before you start.
Gas versus electric: what changes and what does not
People overthink this. The descaling loop, the pump, the bucket, the two hoses on the service valves, the 45 to 60 minutes of circulation, the fresh-water rinse, is the same whether the unit burns gas or runs on elements. What changes is the shutdown before you touch it. A gas tankless gets its gas supply turned off. An electric tankless gets its breaker flipped off or the plug pulled. That is the whole safety difference in the descale itself. The bigger practical split is hardware. Most whole-home gas and electric tankless units either ship with or accept a service valve kit. But a lot of small electric point-of-use heaters were built without valves and expect you to remove the heating elements to clean them, which is a different job. Look at your unit's plumbing before you assume the bucket-and-pump method even applies.
Do not skip the inlet filter screen
The descale gets all the attention, but the cold water inlet filter screen is where half the real-world flow complaints hide. Nearly every tankless unit has a small screen on the cold inlet, behind the cold service valve or under a drain plug, that catches grit and mineral flakes before they reach the coil. It clogs slowly, and a clogged screen strangles flow. Low flow is exactly what triggers a flow-fault code, a lukewarm hot-cold sandwich at the tap, or a unit that refuses to light on a trickle. Cleaning it takes half a minute. After the descale and the fresh-water rinse, close the water, pull the screen out, rinse the debris off under a running faucet with your fingers, dry it, and reinstall it. Reopen the water and watch the fitting for leaks before you restore gas or power.
How a tankless flush differs from draining a tank
If you have flushed a storage tank before, throw out the mental picture. A tank holds forty or fifty gallons of standing water, and its maintenance is draining sediment that settles on the bottom. You screw a garden hose onto the drain valve, open it, let the tank empty, and crack the cold supply to stir the grit until the water runs clear. No acid, no pump, no circulation. A tankless heater holds no standing water at all, so there is nothing to drain and draining would accomplish nothing. Its scale is bonded to the inside of the heat exchanger coil, and the only way to remove that is to circulate a descaling solution through it under pump pressure. Same enemy, minerals in the water, but the tank collects loose sediment you rinse away, while the tankless grows hard scale you have to dissolve. Two procedures, and using the wrong one does nothing but waste an afternoon.
Frequently asked
How often should I flush a tankless water heater?
The four big brands agree on the floor: at least once a year. Rinnai, Navien, Noritz, and Rheem all put annual descaling in their maintenance schedules. Water hardness moves that number. If you have hard water and no softener, plan on twice a year, because scale builds on the heat exchanger faster than a soft-water home would ever see. If your whole house runs through a working softener, some units can stretch closer to every other year. Two things push you to flush sooner no matter the calendar: a drop in hot water flow or temperature that you cannot explain, and a maintenance or scale-related error code on the display. Both usually mean the coil is already fouling.
Can I use vinegar to flush a tankless water heater, or do I need a real descaler?
It depends on the brand, and this is where people get burned. Rinnai specifically calls for about four gallons of undiluted white vinegar and tells you never to run chemical cleaners through the unit, because your drinking and bathing water flows through that same heat exchanger. Navien approves either household white vinegar or an approved descaling solution. Some other makers do not bless vinegar at all, and a few warn it can attack certain gaskets or simply will not cut heavy scale. So the honest answer: open your own manual first. White vinegar is cheap, safe to handle, and fine for light to moderate scale in most residential units. A commercial descaler works faster and bites harder on heavy hard-water buildup, but it is a chemical, so you rinse longer afterward.
How long do you circulate the solution?
Run the pump so the solution circulates through the heat exchanger for about 45 to 60 minutes. Navien puts the floor at 45 minutes. Vinegar sits at the longer end of that range because it is milder than a commercial descaler. If the unit has heavy scale, or it has been more than a year, some makers tell you to dump the used vinegar at the halfway point, refill with fresh, and run it again, since the acid gets spent as it dissolves mineral. When the circulation time is up, that is not the end. You still have to flush clean water through the unit for five to ten minutes to carry out every trace of acid or descaler before it goes back into service.
What if my tankless heater has no isolation valves?
Then you cannot flush it as-is, and forcing it is not worth the risk. The pump and hoses connect to the drain ports on the isolation, or service, valves. No valves means nowhere to hook up and no way to keep house water from fighting the loop. Some brands, Rheem among them, flatly require isolation valves to flush the unit. The right fix is to have a plumber install a tankless service valve kit, a matched pair of color-coded hot and cold valves with drain ports and usually a relief valve, sized to your unit. It is a one-time job that turns every future flush into an hour of your own time. Disconnecting at the unions to flush without valves is possible but it is a wet, fussy job that most homeowners should hand to a pro.
Do you flush a gas tankless the same way as an electric one?
The descaling loop is identical. Same pump, same bucket, same hoses, same solution circulated through the heat exchanger. The difference is how you shut the unit down before you start. On a gas tankless you turn off the gas supply. On an electric tankless you turn off the breaker or unplug it. The other wrinkle is on the electric side: many small point-of-use electric units were never built with service valves, and a few require pulling the heating elements out to descale them by hand or through a makeshift loop. EcoSmart and some others offer a valve option so you can flush without removing elements. Check whether yours has service ports before you buy a pump.
Is flushing a tankless heater the same as flushing a tank water heater?
No, and it trips people up. A storage tank holds forty or fifty gallons of standing water, and the maintenance job there is draining sediment off the bottom. You hook a garden hose to the drain valve, open it, and let the tank empty, cracking the cold supply to stir up the grit until it runs clear. There is no acid and no pump. A tankless heater holds no standing water, so there is nothing to drain. Its problem is scale bonded to the inside of the heat exchanger coil, and the only way to remove that is to circulate a descaling solution through it under pump pressure. Same goal, keep minerals from wrecking the unit, but two completely different procedures. Do not drain a tankless expecting it to help, and do not try to pump vinegar through a tank.
Should I clean the inlet water filter screen when I flush?
Yes, do it every time, because it is thirty seconds of work that prevents a whole class of complaints. Most tankless units have a small filter screen on the cold water inlet, usually tucked behind the cold service valve or under a drain plug. It catches grit and mineral flakes before they reach the heat exchanger, and it slowly clogs. A blocked inlet screen chokes flow, and low flow is exactly what triggers a flow-related error code, a lukewarm hot-cold sandwich at the tap, or a unit that will not fire at low demand. After you finish the descale and the fresh-water rinse, pull the screen, rinse the debris off under running water with your fingers, dry it, and put it back. Turn the water on and check for leaks.