Draining a water heater is a fifteen-minute job on paper, yet the two steps most guides skip are exactly the ones that scald a hand or burn out a heating element. Get the order right and it is boring; get it wrong and you are shopping for a new element or nursing a burn.
The safe drain sequence, in order
-
1Kill the power, or set gas to PilotNever leave an element energized while the tank drains.2 min
-
2Shut the cold-water supplyClose the cold inlet on top so the level actually drops.1 min
-
3Let it coolHot water is 120 to 140 degrees F, enough to scald in seconds.1-2 hr
-
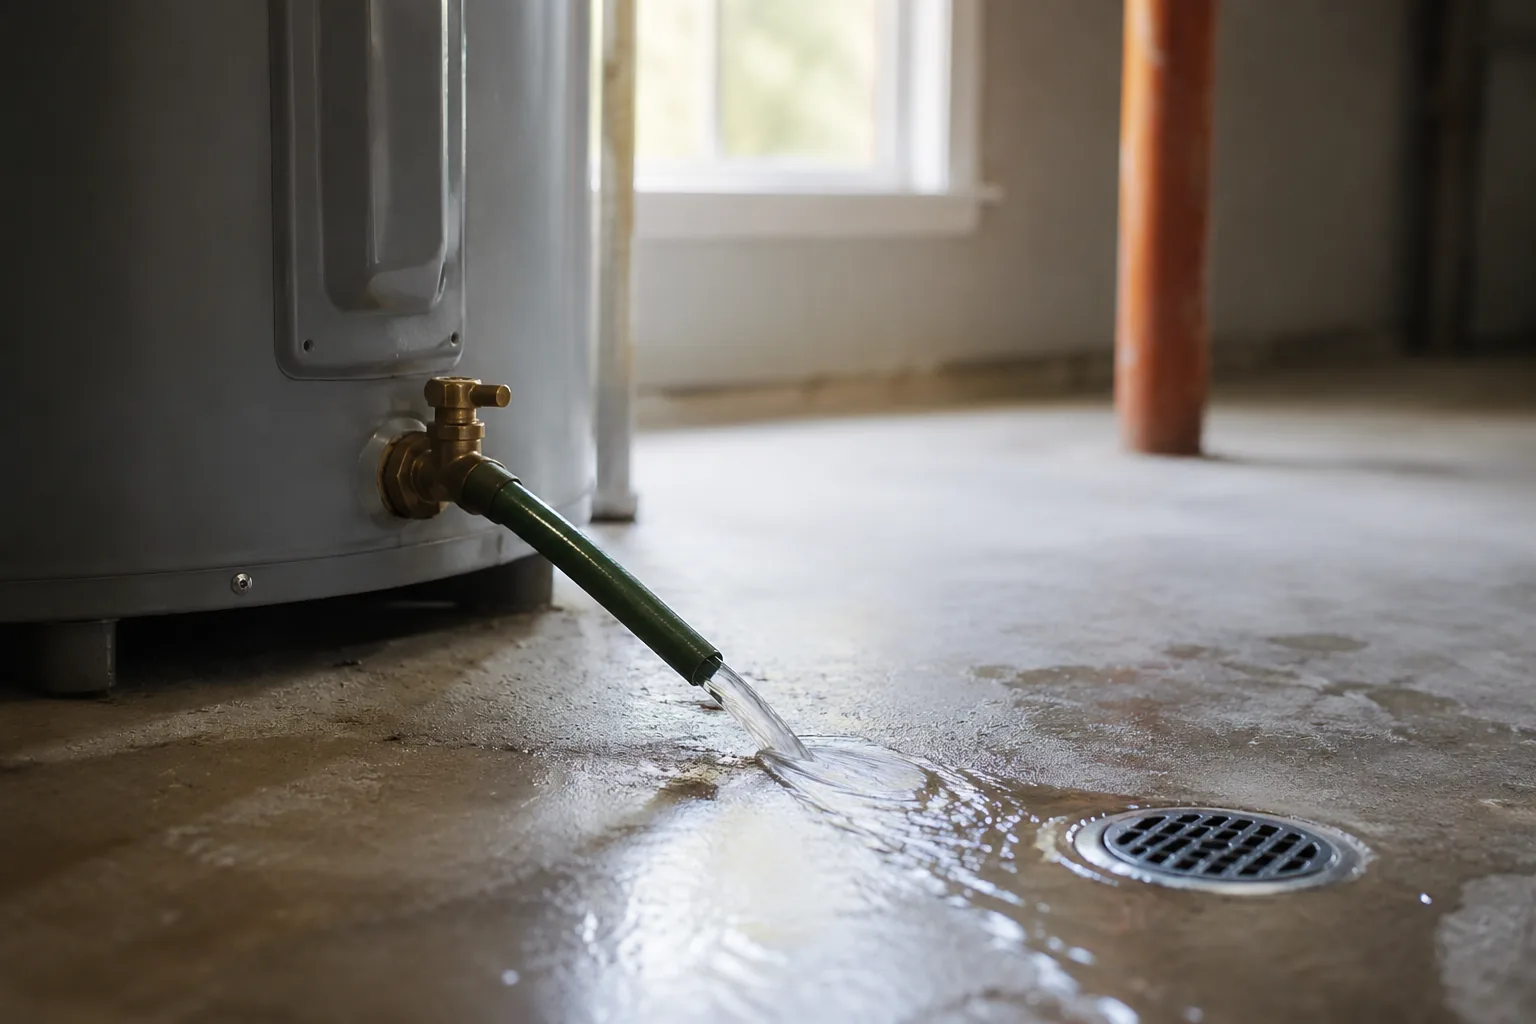
4Hook a hose to the drain valveRoute the far end downhill to a drain, sink, or outside.3 min
-
5Open a hot tap and the T&P leverBreaks the vacuum so the tank actually drains.1 min
-
6Open the drain and flushA 50-gallon tank empties by gravity, brown first, then clear.30-60 min
-
7Refill and purge air, then restore powerPower back on only after a hot tap runs steady.20 min
Start here: why are you draining?
People reach for a drain for four different reasons, and the tail end of the job changes with each one. A yearly sediment flush only needs a partial drain and refill, with the gas and water lines left alone. Replacing the heater means the tank comes out empty and the lines get disconnected. Winterizing a cabin means the tank sits bone dry for months, so standing water is the enemy. Fixing a leaking or seized drain valve means you empty the tank specifically to swap the valve. Tap your reason below to see the short checklist tuned to it, then read the full master steps under the photo.
Reason-based drain checklist
Pick the tab that matches why you are draining. Each one changes the ending: full drain or partial flush, whether to disconnect the gas and water lines, and whether to leave the tank empty.
Flushing sediment (annual)
A partial drain and refill. You do not empty the tank fully or touch any lines.
- Power off or gas to PilotKill the breaker or set the gas dial to Pilot. No dry-firing an element.
- Close the cold supply, hose on, hot tap openShut the inlet, connect the hose, open an upstairs hot tap to break the vacuum.
- Drain a few gallons, then burst the cold supplyYou do not need it bone dry. Drain part way, then flick the cold on and off to stir sediment out. Repeat until clear.
- Close the drain, refill, purge airShut the drain, open the cold supply, run the hot tap until steady. Leave the gas and water lines connected.
- Restore power or relight the gasOnly after the tank is full and the air is gone. Done for the year.
Full drain for replacement
A full drain, and this time the lines come apart. The tank leaves empty.
- Power off, or gas off and line shutElectric: breaker off. Gas: dial to Off, then close the gas shutoff valve on the supply line.
- Close the cold supply and drain fullyEmpty the whole tank, hot tap and T&P lever open so it drains completely. 30 to 60 minutes.
- Disconnect the water linesWith the tank empty, unthread or cut the hot and cold connections at the top. Have towels ready for the last cupful in each line.
- Disconnect the gas line and ventGas only: disconnect the union at the gas valve and detach the flue. Cap or plug the gas line if it stays live nearby.
- Leave it empty and move itAn empty 50-gallon tank still weighs 130 to 150 pounds. Walk it out on a hand truck, do not lift it full.
Winterizing (or moving)
A full drain, then the tank stays dry, sometimes for months. Standing water is the enemy.
- Power off or gas offShut the breaker, or set the gas dial to Off. A tank that will sit empty must never see power.
- Close the cold supply and drain fullyHot tap and T&P lever open, drain every gallon so nothing is left to freeze or turn stale.
- Blow out the low spotsLeave the drain valve open and the hot tap open so residual water weeps out. Some people push air through to clear the lines.
- Leave the drain valve open and lines openAn open system cannot build pressure or trap water that freezes and splits a fitting.
- Tag the heater "EMPTY - refill before power"So whoever fires it next refills and purges air first, instead of dry-firing an element.
Fixing a stuck valve
A full drain so you can unscrew the valve itself. Refill and refire at the end.
- Power off or gas to PilotStandard shutdown. No energized element in a draining tank.
- Close the cold supply and drain fullyThe tank must be empty and depressurized before the valve comes out, or you get a soaking.
- Confirm zero pressureLeave the drain and a hot tap open. When it stops dripping, the tank is empty and safe to open.
- Swap the valveUnthread the old plastic valve and install a full-port brass ball valve with fresh thread tape. Snug, not gorilla-tight.
- Refill, purge air, restore heatClose the new valve, open the cold supply, run the hot tap until steady, then power on or relight. Check the new valve for weeps.
When you actually need to drain the whole tank
People reach for a full drain for four common reasons, and they are not the same job. A yearly sediment flush only needs a partial drain and refill. Replacing the heater means the tank comes out empty and the water and gas lines get disconnected. Moving a house or winterizing a cabin means the tank sits bone dry, sometimes for months. And a leaking or seized drain valve means you empty the tank specifically so you can swap the valve. The core steps below are the same for all four, but the ending differs, so pick your reason in the checklist further down and follow the tail that fits.
One thing that never changes: you are moving a lot of very hot water. A 50-gallon tank holds roughly 400 pounds of water, and if the heater ran recently that water is 120 to 140 degrees F. That is hot enough to give a second-degree burn in seconds. Everything about the safe sequence is built around not putting your hand, or your hose, in the path of that water while it is still that hot.
What you need before you start
- A garden hose long enough to reach a floor drain, a utility sink, or downhill to the outside.
- Gloves and eye protection. The first water out is the hottest and dirtiest.
- A flathead screwdriver for the common plastic drain valve, which has a slotted stem.
- A bucket and old towels to catch the dribble when you pull the hose.
- A transfer pump only if the tank sits below your drain point and gravity will not do the work.
Know where your home's main water shutoff is before you touch anything, so if the tank's own cold-inlet valve is seized you can still stop the fill.
Drain a water heater, step by step
These are the eight steps for a standard full drain. Do them in order. The two flagged in red are the ones that hurt people or wreck heaters when skipped.
Cut the power or set the gas to Pilot
On an electric tank, switch the heater's double-pole breaker to OFF at the panel. On a gas tank, turn the gas control dial to Pilot or Off. Never let an electric element sit energized in a draining tank. A dry element burns out in seconds, and that is the classic drain-day disaster.
Let the water cool if you can wait
If time allows, leave the heater off for an hour or two so the water drops out of the scald zone. If you cannot wait, plan to drain slowly and keep hands and face clear of the hose end. Fully hot water through a hose is a real burn risk.
Shut the cold-water supply
Find the cold inlet valve on top of the heater and close it. This stops fresh water from feeding the tank while you empty it, so the level actually drops instead of chasing its tail.
Connect the garden hose to the drain valve
Thread the hose onto the drain valve at the bottom of the tank and route the far end to a floor drain, a utility sink, or downhill outside. Gravity does the work only if the outlet sits lower than the valve. If the tank is in a basement below grade, you will need a transfer pump.
Open a hot tap upstairs to break the vacuum
Turn on a hot-water faucet at the highest fixture in the house, and lift the lever on the T&P relief valve too. Without an air inlet the tank will not drain, the same way a finger over a straw holds water in place. This is the step people forget when a wide-open drain valve barely trickles.
Open the drain valve and let it run
Open the valve fully. The first water may be brown and gritty as the sediment lifts. A full 50-gallon tank takes 30 to 60 minutes by gravity, longer if the tank is heavy with sediment and the flow keeps choking down.
Optional: stir the sediment with a cold burst
If you are draining to clear sediment, briefly reopen the cold supply for a few seconds with the drain still open. The rush of cold water swirls the settled crud off the bottom and pushes it out the hose. Repeat until the water runs clear.
Close the drain, remove the hose, then refill and purge air
Shut the drain valve, pull the hose into your bucket, and close the T&P lever if you lifted it. Open the cold supply and leave that upstairs hot tap running. When it flows a steady, sputter-free stream, the tank is full and the air is out. Only now flip the breaker back on or relight the gas. Restoring heat to a tank that is not completely full is what kills electric elements.
When the tank will not drain
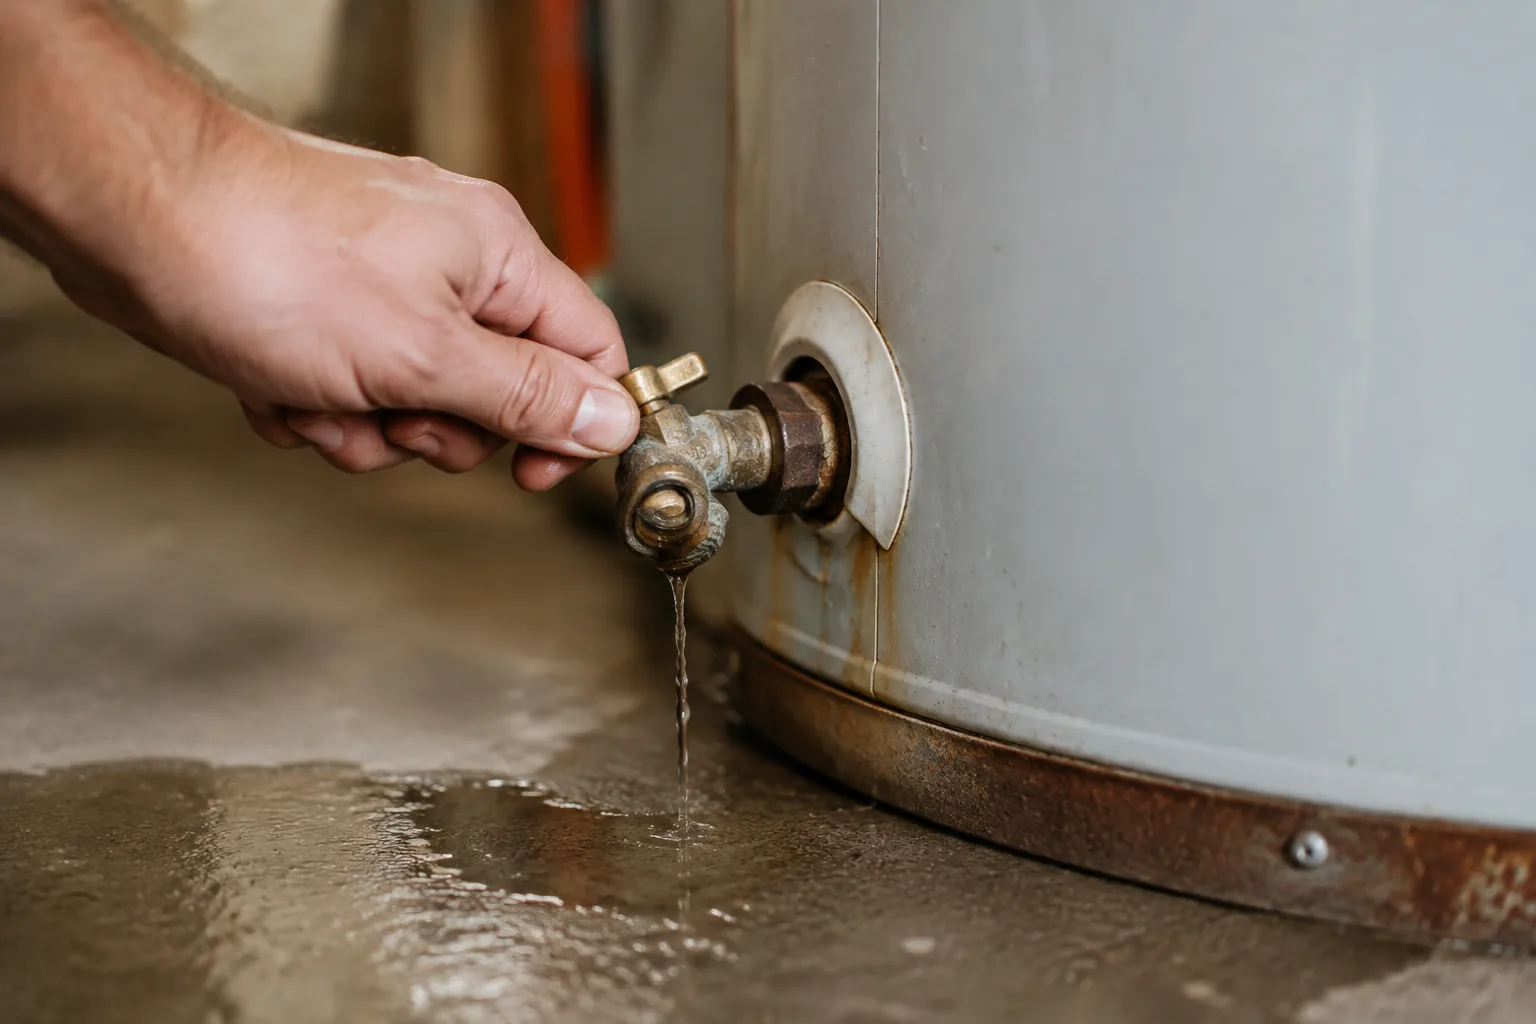
A wide-open drain valve that gives you a trickle, or nothing, almost always means sediment has packed the valve throat. This is worst on the cheap plastic drain valves that most heaters ship with, because their narrow opening clogs on the first big chunk. Do not force the stem; snapping a plastic valve on a full tank turns a chore into a flood. Instead:
- Back-flush it. Close the drain, open the cold supply for a few seconds to build pressure, then reopen the drain. The surge often blows the clog clear.
- Poke it. With the valve open, work a straightened coat hanger or stiff wire into the opening to break up the packed grit.
- Cycle the valve. Open and close it several times; the moving seat can shear off caked sediment.
- Plan a valve swap. Once the tank is finally empty, replace the plastic valve with a full-port brass ball valve so the next drain is painless.
Why refilling before power matters so much
The dry-fire warning is not boilerplate. An electric heating element is a coil designed to shed its heat into surrounding water. Energize it in air, even for a few seconds, and the coil has nowhere to dump that heat, so it glows, overheats, and burns open almost instantly. That is why the last step is always refill, purge the trapped air until a hot tap runs steady and quiet, and only then close the breaker. Gas burners are more forgiving because the flame heats the tank from below rather than an immersed element, but firing a gas heater with a half-empty tank still stresses the steel, so the same rule holds: full first, heat second.
How long the whole job takes
Budget an hour if you want to be relaxed about it. The drain itself is 30 to 60 minutes on a 50-gallon tank draining by gravity, and heavily sedimented tanks run to the long end because the flow keeps choking down as grit reaches the valve. Add cooldown time up front if you skipped it, and add twenty minutes at the back for refill and air purge. A smaller 40-gallon tank drains faster; an 80-gallon tank or a slow, clogged valve can stretch past ninety minutes. None of it is hard work, but it is not a five-minute job either, so do not start it fifteen minutes before you need a shower.
Frequently asked
How long does it take to drain a water heater?
A full 50-gallon tank drains in 30 to 60 minutes by gravity, longer if it is heavy with sediment and the drain valve keeps choking down. Add cooldown time up front if the water is still hot, and about twenty minutes at the back to refill and purge the air. Budget an hour to be comfortable.
Why won't my water heater drain?
Two usual causes. Either you did not open a hot tap or the T&P lever to break the vacuum, so the tank holds its water like a finger over a straw, or sediment has clogged the drain valve. Open an upstairs hot faucet first. If it still barely trickles, back-flush by pressurizing with the cold supply, then poke the valve opening with a stiff wire.
Do I turn the power off before draining a water heater?
Yes. Switch an electric heater's breaker off at the panel, or set a gas dial to Pilot or Off. This matters most on electric tanks: an element energized while the tank drains has no water to shed its heat into and burns out in seconds. Leave the power off until the tank is refilled and the air is purged.
Should I drain the tank hot or let it cool first?
Let it cool if you can. Fully hot water is 120 to 140 degrees F, hot enough to scald in seconds as it runs through the hose. If you cannot wait an hour or two, drain slowly and keep your hands and face clear of the hose end. There is no reason to rush hot water past bare skin.
Do I have to refill before turning the power back on?
On an electric heater, absolutely. An element energized in an empty or partly empty tank overheats and burns open almost instantly. Wait until an upstairs hot tap runs a steady, sputter-free stream, which means the tank is full and the air is out, then restore power. Gas units are more forgiving but should also be full before you relight.
My drain valve is plastic and clogged - what do I do?
Do not force the stem; a plastic valve snapped on a full tank causes a flood. Back-flush it by closing the drain, pressurizing with the cold supply, then reopening. Poke the opening with a straightened coat hanger, and cycle the valve open and closed to shear off packed grit. Once the tank is empty, replace it with a full-port brass ball valve so future drains are painless.