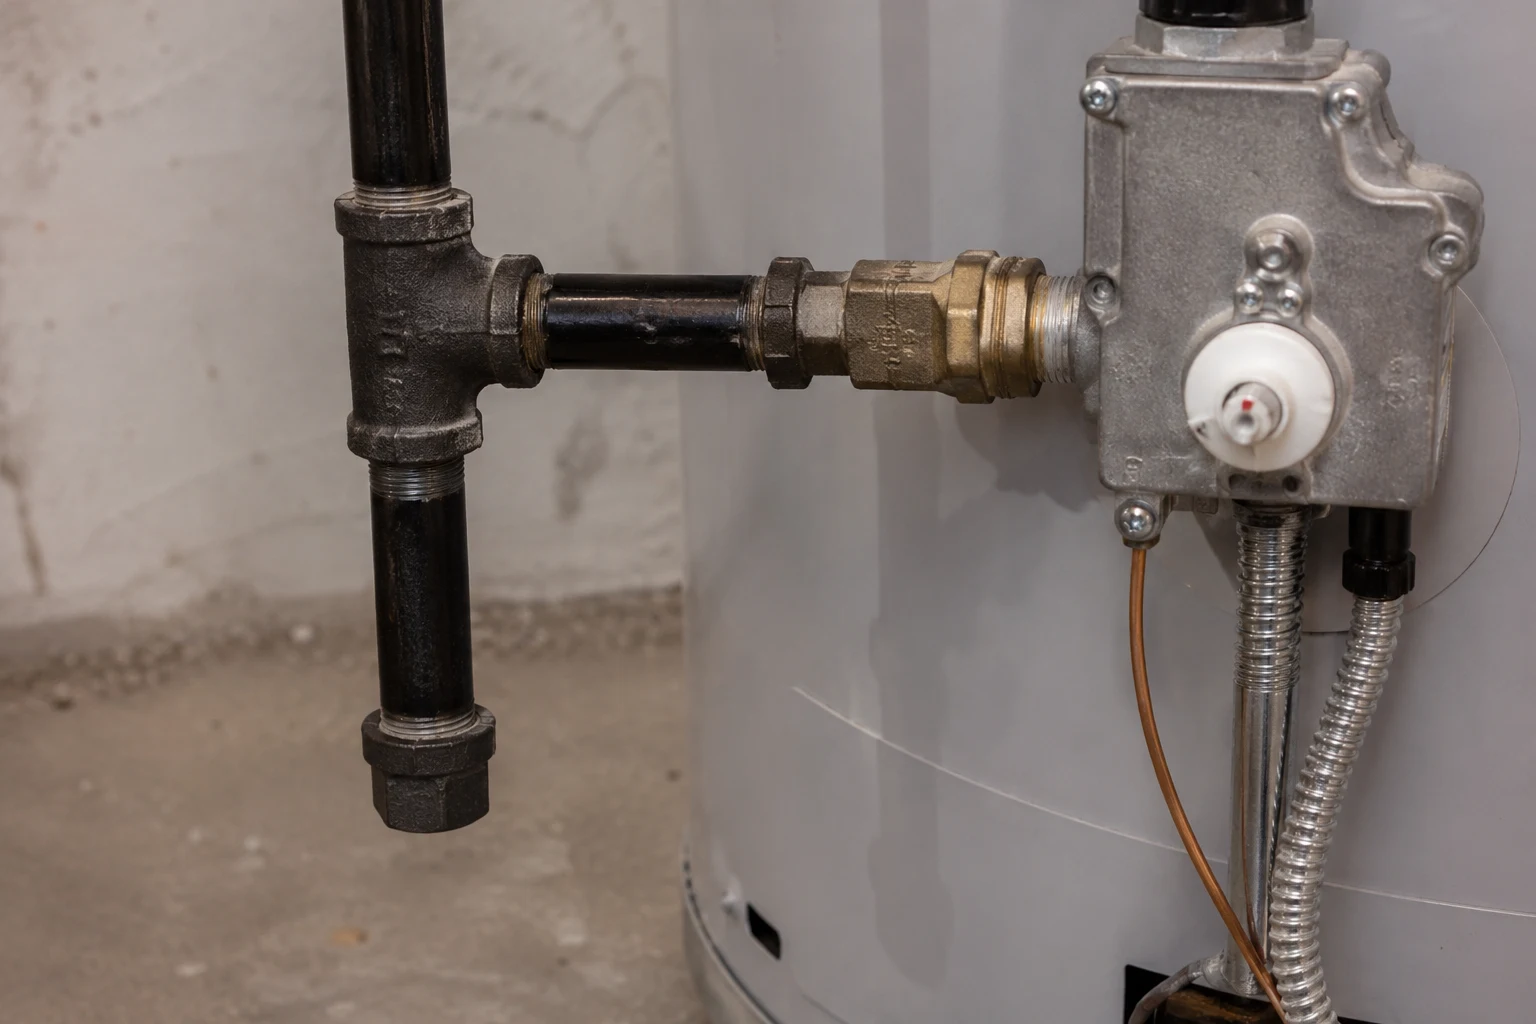
Look at the gas line where it meets your water heater. Just past the shutoff valve, before the flexible connector reaches the control, there should be a short stub of pipe pointing straight at the floor with a cap on the end. That stub is the drip leg. It is one of the cheapest fittings on the whole appliance, and when an installer skips it or screws it on the wrong way, it is one of the most common reasons a new water heater fails inspection.
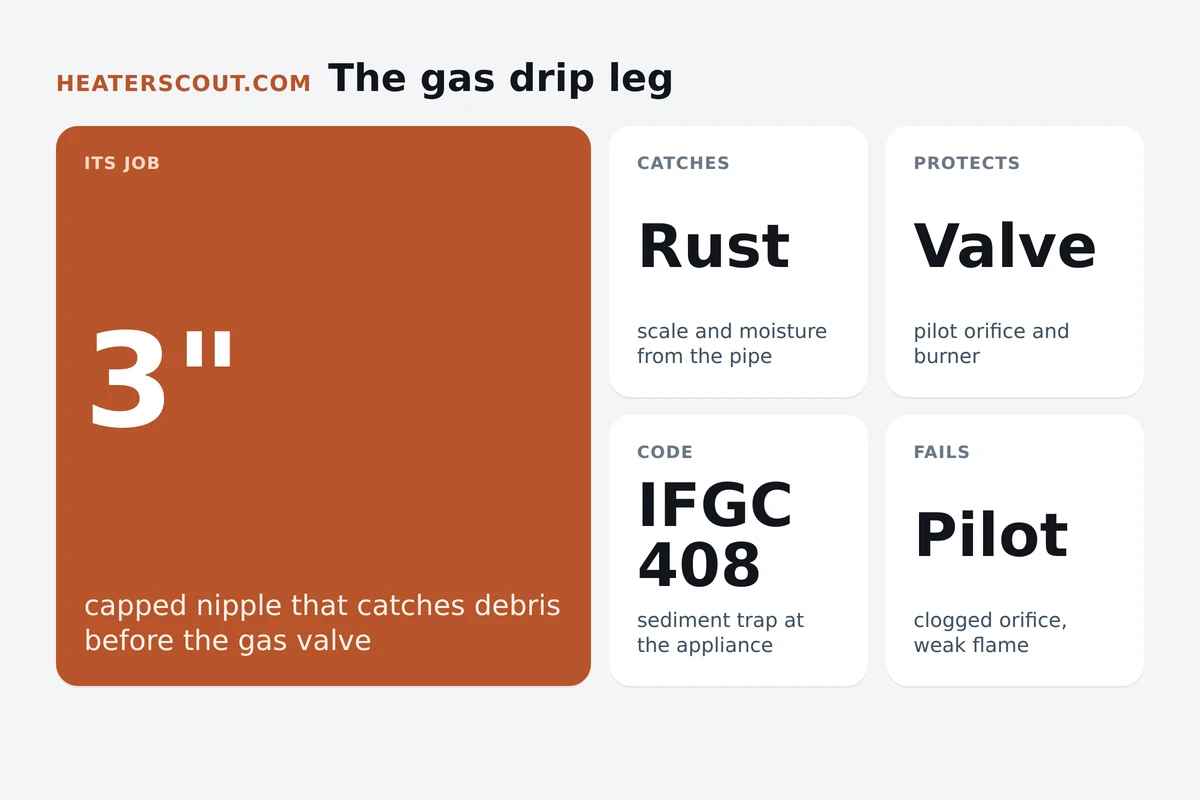
Drip leg / sediment trap / dirt leg
A short vertical capped nipple hung from the branch of a tee in the gas supply, placed downstream of the appliance shutoff and close to the gas inlet. Gas travels through the run of the tee to the control valve; anything heavier than gas that rides along the pipe (moisture, rust flakes, pipe scale) drops into the capped leg instead of reaching the valve. Strictly, a drip leg catches condensate and a sediment trap catches solids, but the fitting is identical and the fuel gas code, inspectors, and installers use the terms interchangeably. Dirt leg is the same thing by a third name.
Why one short fitting matters
Gas pipe is not clean inside. Black iron rusts, threading leaves cutting oil and metal filings, and old lines shed scale for years. Utility gas can also carry trace moisture that condenses in the pipe. All of that debris tends to travel with the flow until something stops it. Without a trap, the next thing in line is the appliance itself, and that is exactly where you do not want grit to land.
The gas control valve on a water heater meters fuel through small, precise passages. The pilot orifice in particular is a tiny opening sized to pass a specific flow. A single flake of rust or a bead of scale lodged in that orifice starves the pilot, and you get the classic complaint: a pilot that will not stay lit, or lights and drops out an hour later. Debris in the main burner passages shows up as a weak, uneven, or yellow-tipped flame that should be crisp and blue. People chase these symptoms by replacing thermocouples and igniters when the real cause is dirt that a two-dollar fitting was supposed to catch. A sediment trap does not clean the gas so much as give the heavy junk a dead-end pocket to fall into, out of the stream, where it sits harmlessly until someone empties it years later.
The correct geometry
The shape is the whole point, and it is easy to get wrong. Start at the shutoff valve on the gas line feeding the heater. Downstream of that valve sits a tee. Gas comes into the tee and leaves through the run, the straight-through path, heading on to the appliance connector and the control valve. The branch of the tee, the side outlet, points straight down. Into that downward branch you thread a nipple at least 3 inches long, and you cap the bottom of it. That capped, downward nipple is the trap. Gravity does the work: gas is lighter than the debris it carries, so the gas turns and flows out the run toward the appliance while rust, scale, and moisture keep going down into the capped leg.
Flip that arrangement any other way and it stops working. If the leg points up, debris cannot fall into it. If gas is made to exit the bottom of the tee, the trap is in the flow path instead of beside it. If the trap sits before the shutoff instead of after it, you cannot service it without killing gas to more than the one appliance, and it may not satisfy the code that asks for the trap near the appliance inlet. The trap belongs after the shutoff, close to the heater, branch down, capped. Get those four facts right and the rest is just thread sealant.
How to add or correct one
Adding a sediment trap where one is missing, or fixing one that points the wrong way, is a short job mechanically. The catch is that it is gas work, and gas work is regulated. In many places you need a licensed plumber or gas fitter and a permit to open the line at all. If you do the work yourself, treat every step as if a leak is on the line, because it is.
If any of that reads as unfamiliar, that is the signal to stop and call a licensed pro who will pull the permit and stand behind the work. The fitting costs a couple of dollars. The consequence of a joint you sealed wrong does not.
What to verify before you call it done
Whether you did the work or you are checking an installer's, run down the same short list an inspector uses. Every item here is a thing that turns an existing trap into a useless or failing one, and each is quick to confirm with your eyes and a spray bottle.
- The capped nipple points straight down, not up or sideways, so gravity can drop debris into it.
- The trap sits downstream of the appliance shutoff valve and close to the gas inlet on the heater.
- Gas flows through the run of the tee to the appliance; the leg is a dead-end branch, not in the flow path.
- The leg is at least 3 inches long and has a cap on the bottom end.
- Joints are sealed with gas-rated yellow compound or gas-labeled PTFE tape, not standard white plumbing tape.
- Every joint has been leak-tested with soapy water under pressure and shows no bubbles.
- Where required, a permit was pulled and the work was done or signed off by a licensed gas fitter.
Codes vary by jurisdiction
Terminology and code specifics vary by jurisdiction. Most of the country follows the International Fuel Gas Code, which calls for a sediment trap downstream of the appliance shutoff near the gas inlet, and treats drip leg, sediment trap, and dirt leg as the same fitting. But some appliances are exempt, and states and cities amend the code and its interpretation. Ranges and dryers are often exempted where a storage water heater is not. When in doubt, ask your local permit office or plumbing inspector what applies to your appliance before you close up the job.
Is a drip leg required by code?
For a gas storage water heater, almost always. The International Fuel Gas Code (Section 408) requires a sediment trap downstream of the appliance shutoff and as close as practical to the gas inlet. Some appliances are exempt and local amendments exist, so confirm with your inspector, but on a water heater a missing or backward trap is a routine inspection failure.
Frequently asked
Is a drip leg required by code?
In most of the country, yes. The International Fuel Gas Code (Section 408) requires a sediment trap downstream of the appliance shutoff valve and as close as practical to the gas inlet on the appliance. A handful of appliances are exempted, and a few states or cities amend the code, so the specifics vary by jurisdiction. Ranges, clothes dryers, and outdoor units are commonly exempted, while a storage water heater almost always needs one. When an inspector red-tags a new water heater, a missing or backward sediment trap is one of the most frequent reasons. If you are unsure what your local code demands, ask the permit office or the plumbing inspector before you close up the job.
What is the difference between a drip leg and a sediment trap?
Strictly, a drip leg is meant to catch condensate and moisture, and a sediment trap is meant to catch solids like rust flakes and pipe scale. In practice they are the same fitting: a tee with a short capped nipple hanging down, and gravity drops both moisture and grit into that dead-end pocket. Codes, inspectors, and installers use the terms interchangeably, and you will also hear it called a dirt leg. The name matters less than the geometry. What counts is a downward-facing capped nipple below a tee, sitting after the shutoff and near the appliance.
Which way does the drip leg point?
Down. The capped nipple has to hang vertically below the tee so gravity can pull debris into it. Gas flows through the run of the tee toward the appliance, and the branch drops straight down to the cap. If the trap points up, sideways, or feeds gas out of the bottom of the tee, it does nothing and will fail inspection. This is the single most common installation mistake: the fitting is present but oriented so debris cannot fall into it.
How long should the drip leg be?
Long enough to actually hold debris, which most codes and manufacturers put at 3 inches minimum below the tee. A 3-inch capped black-iron or CSST-terminated nipple is the standard. Some inspectors like to see a little more. There is no penalty for a longer leg as long as it clears the floor and does not strain the connection, so a 3 to 4-inch nipple with a cap is a safe, common choice.
What thread sealant do I use on a gas drip leg?
Use a gas-rated pipe joint compound, usually a yellow paste made for fuel gas, or PTFE tape that is specifically labeled for gas (often yellow and thicker than plumbing tape). Do not use standard white plumbing PTFE tape unless the roll is rated for gas. Apply sealant to the male threads only, keeping it off the first thread so nothing sheds into the gas stream. After assembly, brush every joint with soapy water while the gas is on and watch for bubbles.
Can I install a drip leg myself or do I need a plumber?
Gas work is code-regulated, and many jurisdictions require a licensed plumber or gas fitter and a permit to open a gas line, even for a fitting this simple. If you are comfortable working on gas, the mechanical part is straightforward: shut off the gas, break the union, add a tee and a capped nipple, seal with gas-rated compound, and leak-test with soap. If you are not certain about your local rules or your own skills, hire a licensed pro and pull the permit. A gas leak is not the place to guess.